

Facilities
Facilities are the places in your organization. Each facility has its own inventory, tasks, and feed. Keep them set up correctly.
View Your Facilities
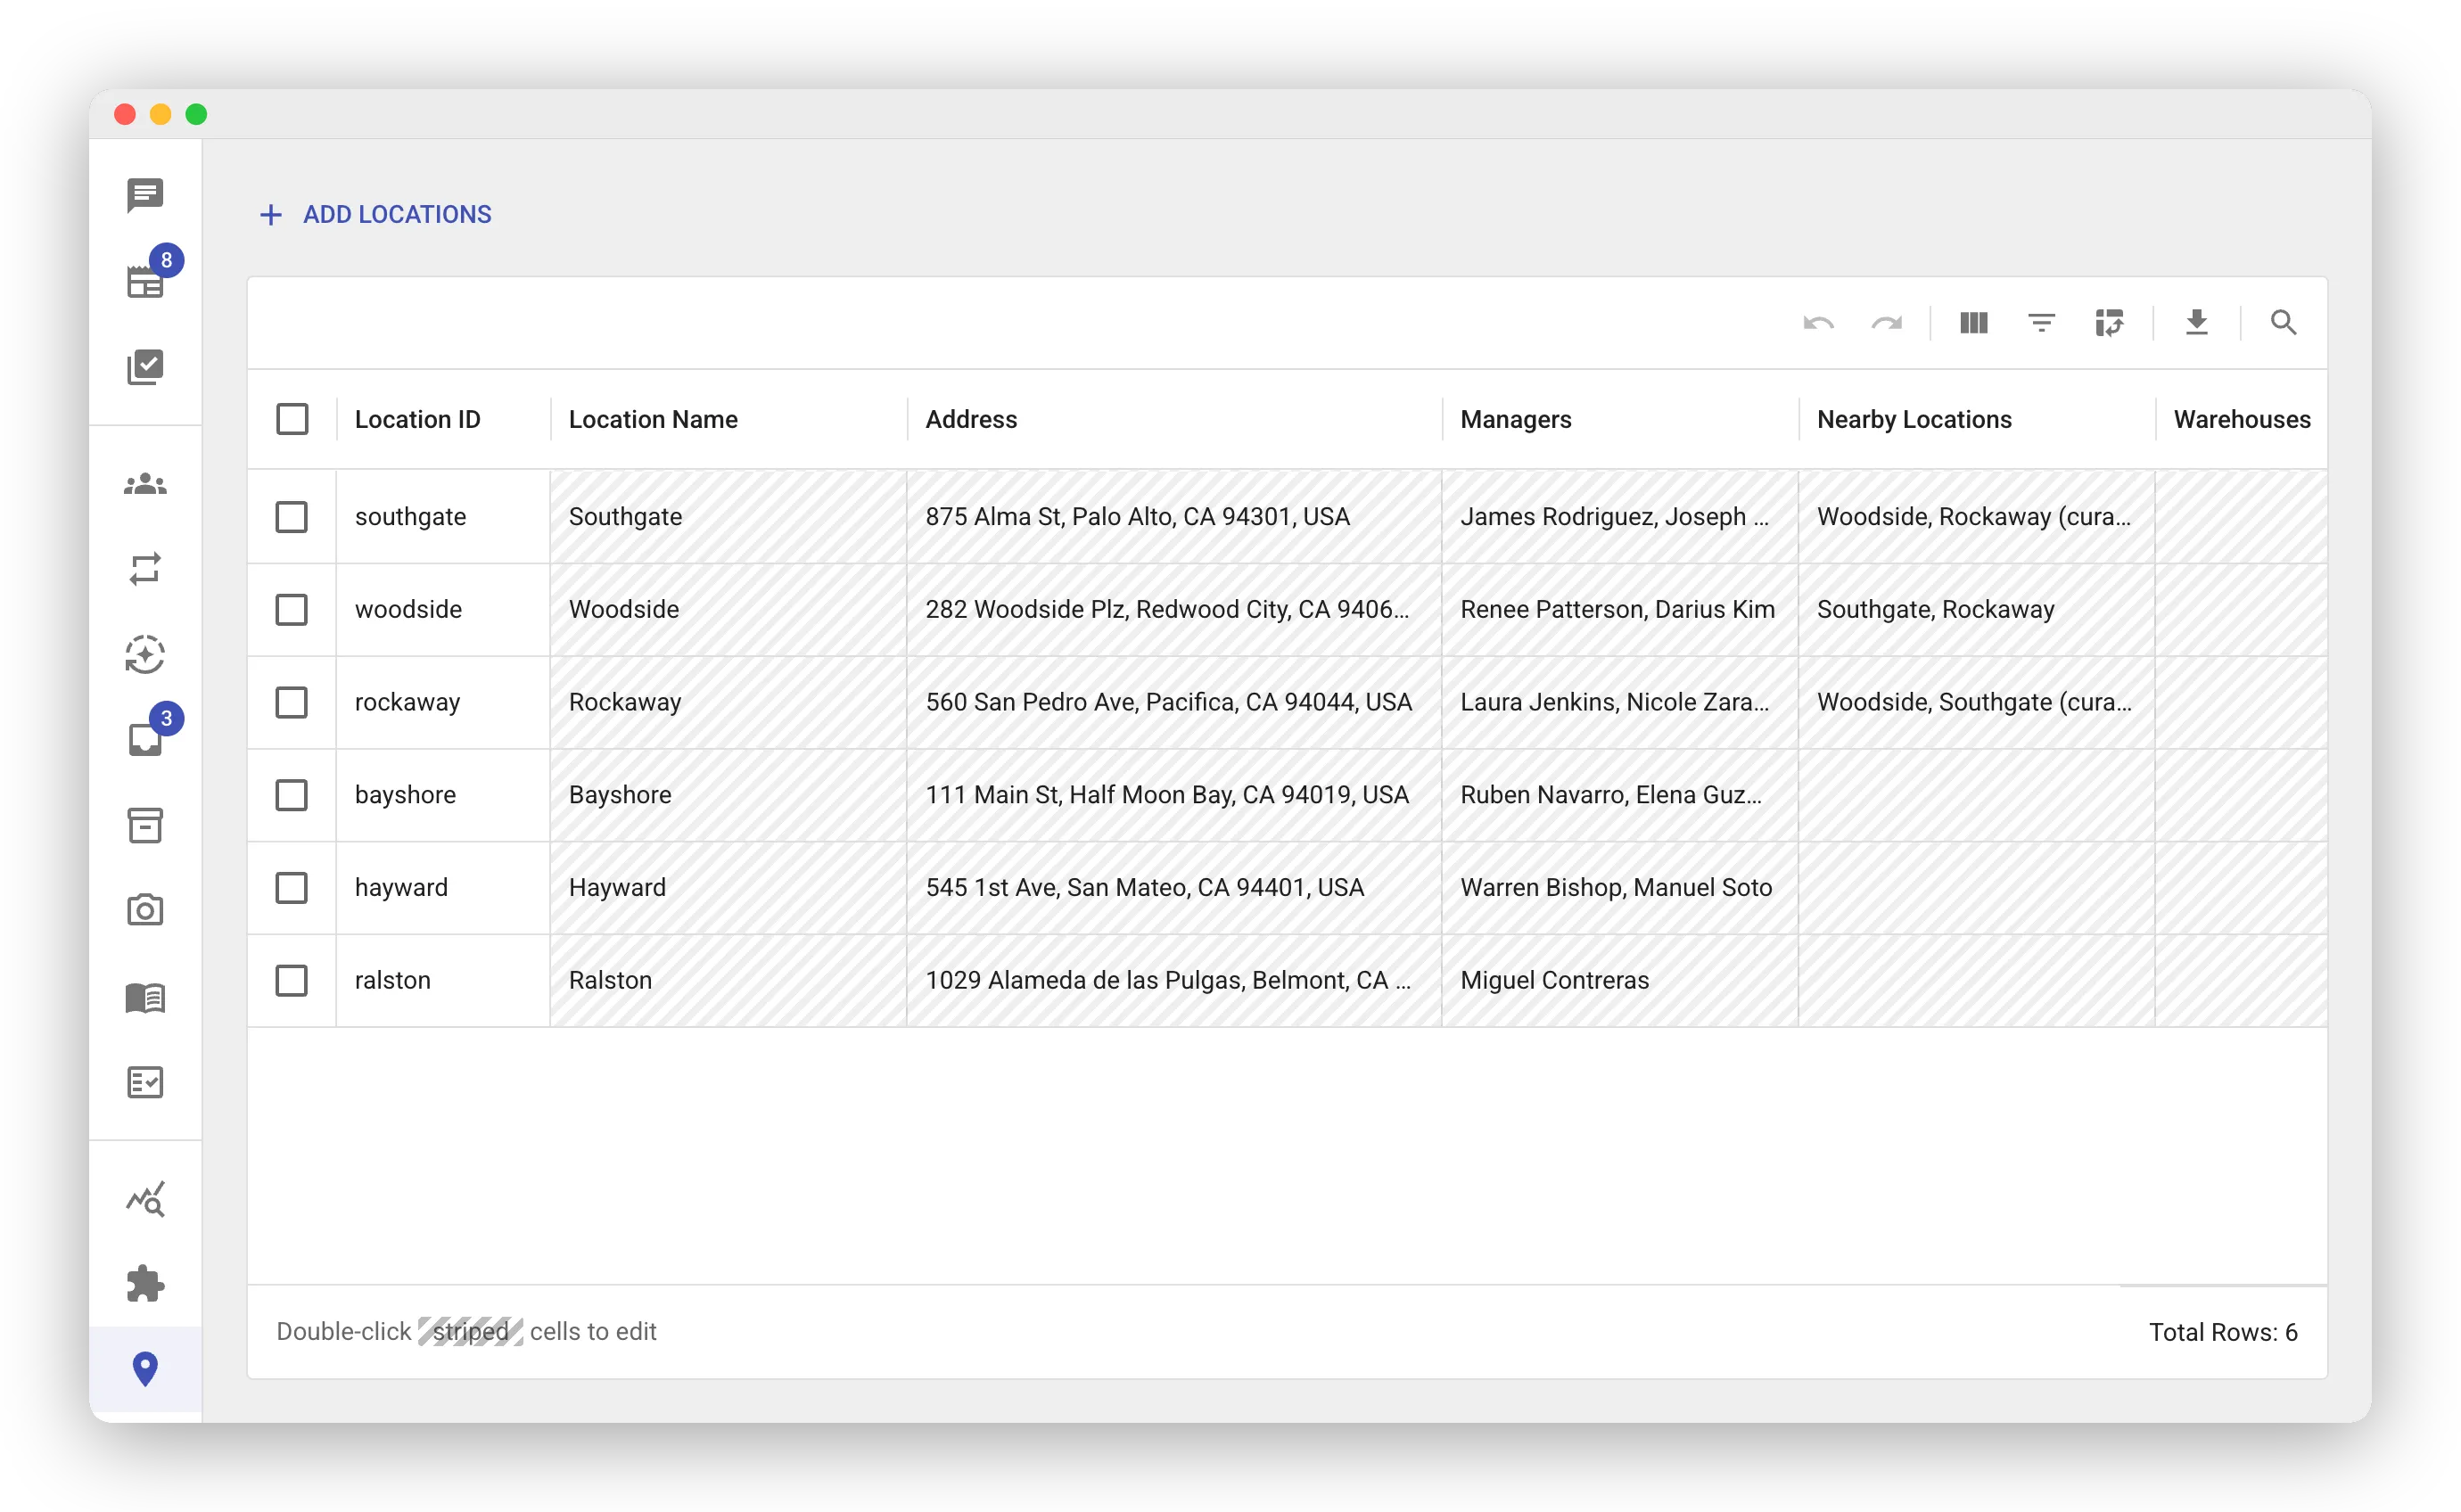
Section titled “View Your Facilities”Open the Locations page in the web app. The grid shows one row for each facility. The columns show the ID, name, address, managers, nearby locations, and warehouses.
Add a Facility
Section titled “Add a Facility”- On the Locations page, click Add Locations. The Add New Locations sheet opens.
- Type each facility’s Location ID, Location Name, and Address into a row. The ID must match your POS or ERP system records.
- Click Save Locations.
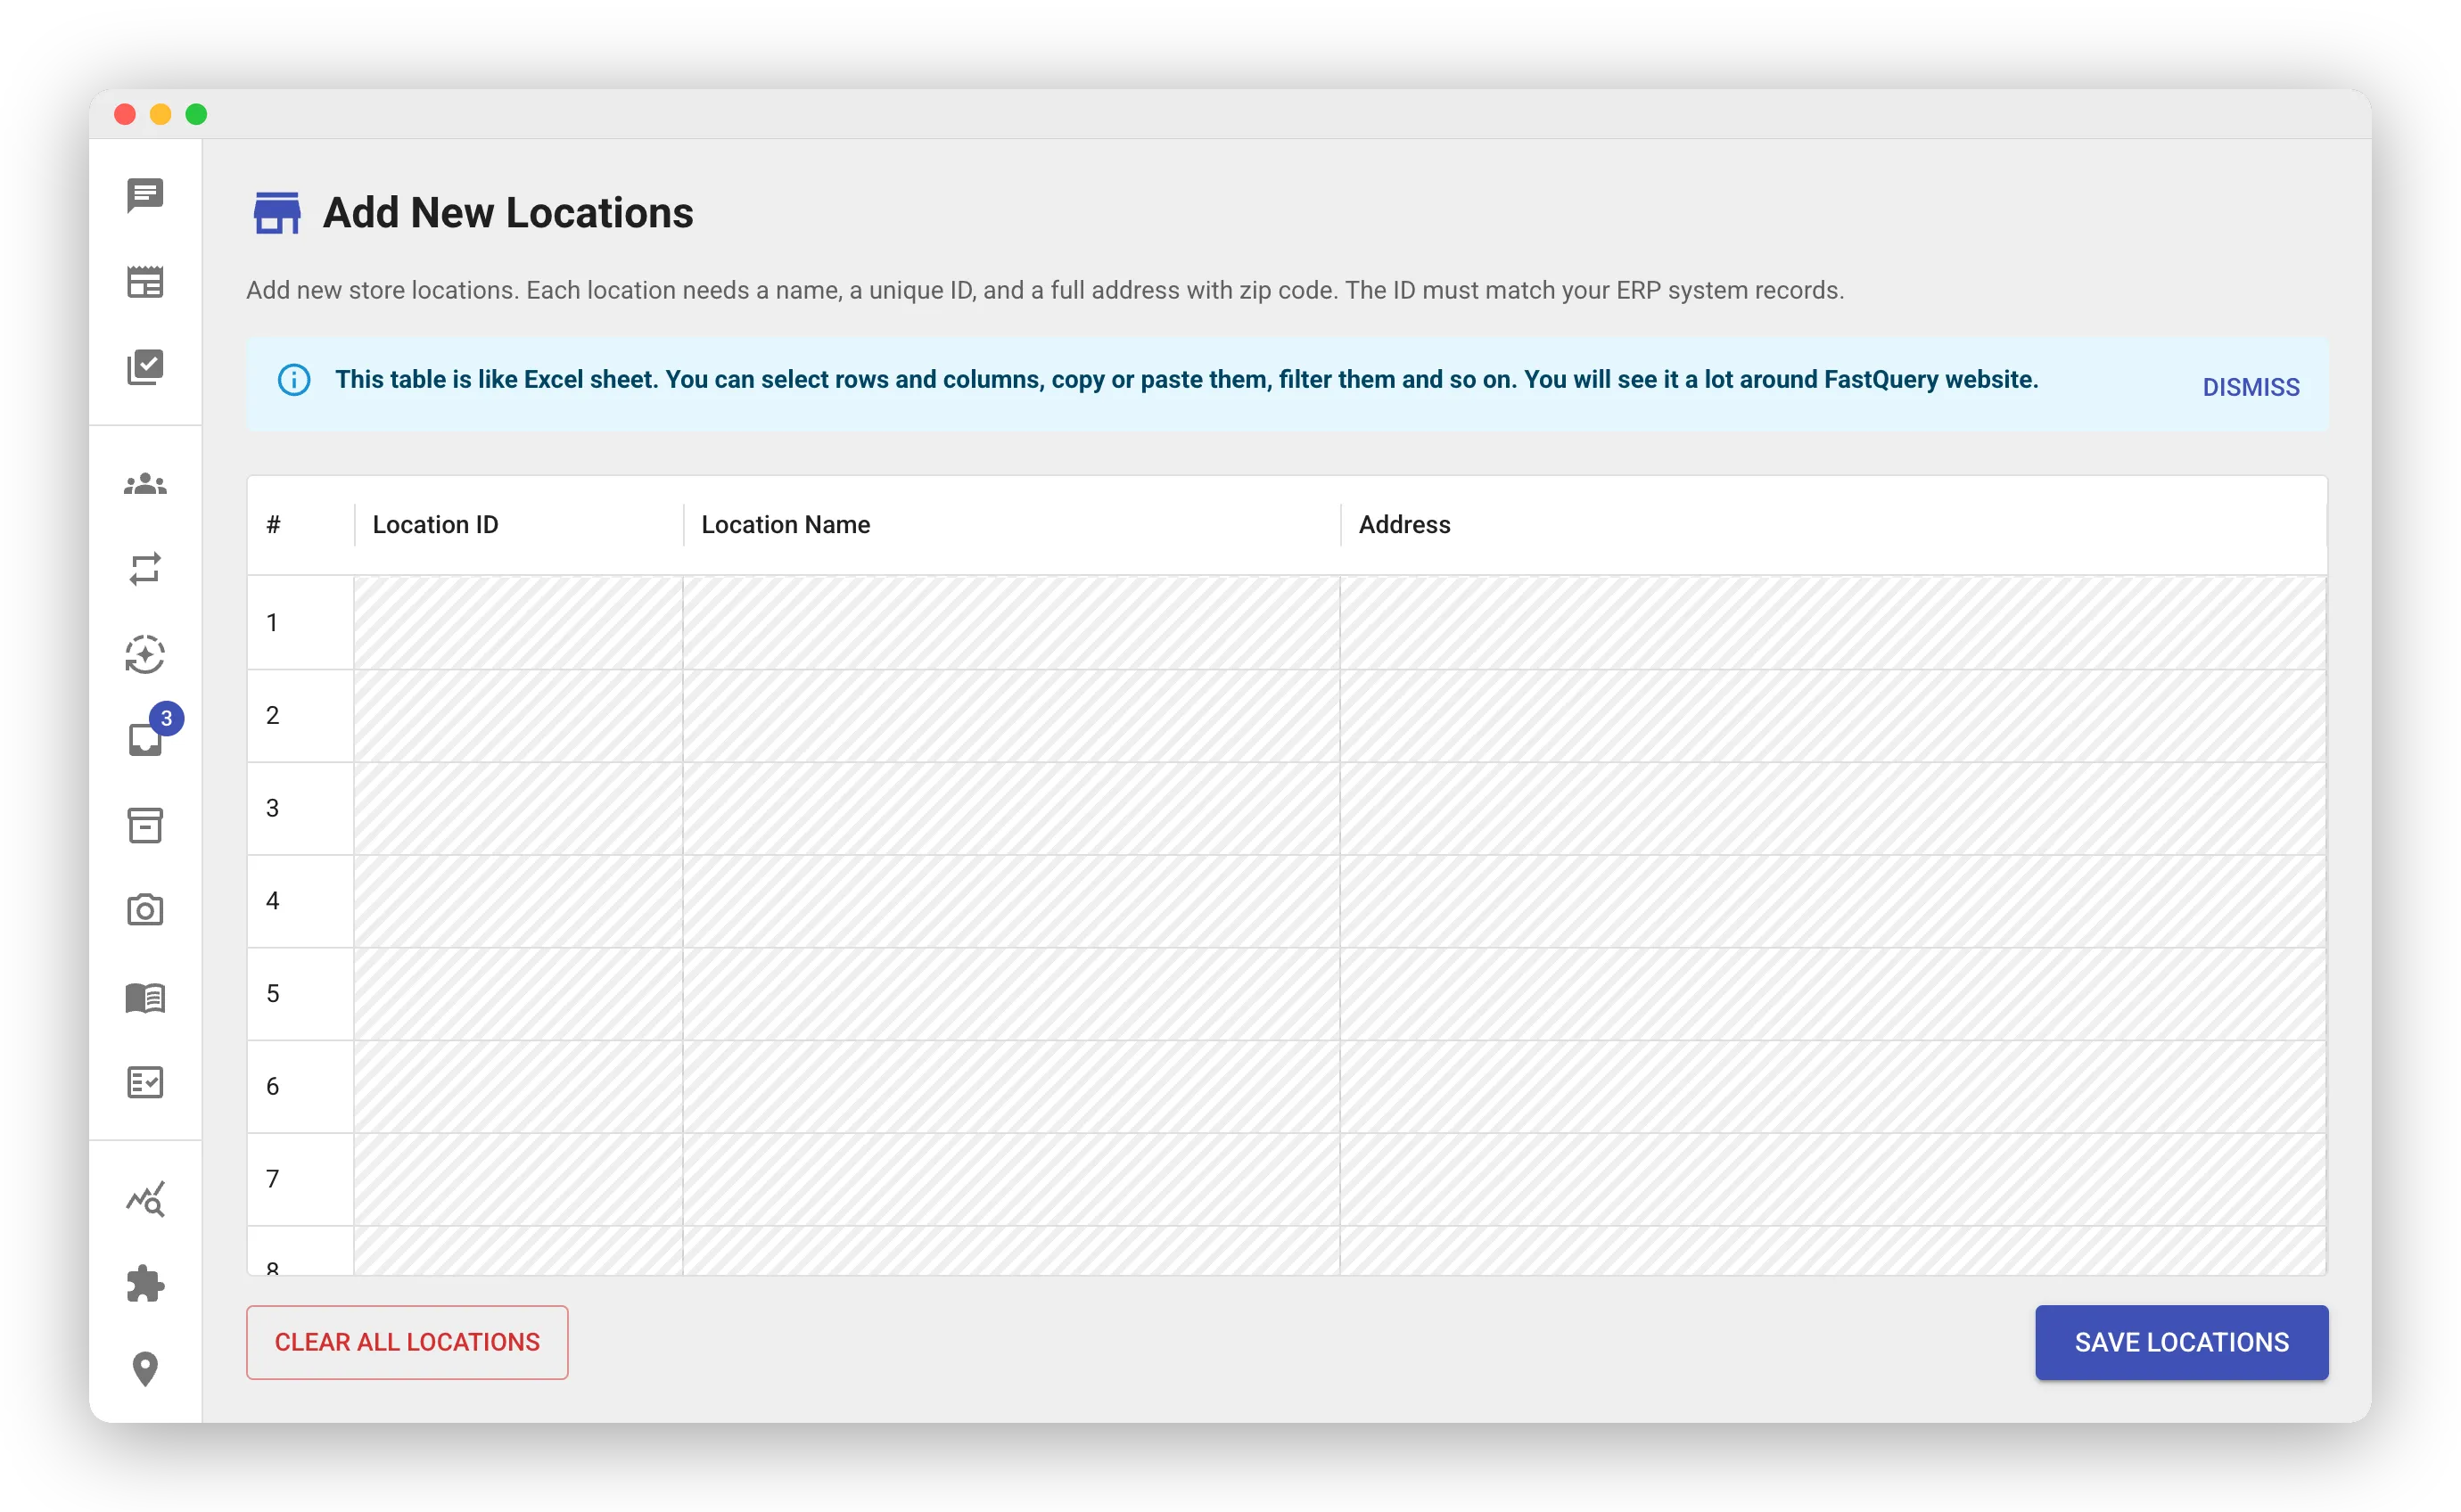
The sheet works like a spreadsheet. You can paste many rows at once.
Facility Types
Section titled “Facility Types”FastQuery supports three types of facilities:
A physical retail facility where customers shop. Stores have a street address and map coordinates. This is the most common type.
Warehouse
Section titled “Warehouse”A distribution center or supplier warehouse. These represent your wholesale partners, like Ace Hardware, Orgill, True Value, and Do it Best. You request warehouse access per supplier on the Integrations page. See Warehouse Suppliers. After approval, everyone in your organization can reference that distributor’s product information.
Virtual
Section titled “Virtual”A headquarters or administrative facility without a storefront. Use this for your corporate office.
Edit a Facility
Section titled “Edit a Facility”Edit facilities directly in the grid on the Locations page:
- Double-click a striped cell. You can edit the name, address, managers, nearby locations, and warehouses.
- Make the change.
- Click Save Changes in the top-right corner.
Nothing saves until you click Save Changes. Discard throws away pending edits. The app warns you before you leave the page with unsaved changes.
To delete facilities, select their rows with the checkboxes. Then click Delete and confirm in the dialog.
Facility Managers
Section titled “Facility Managers”Every store has a Managers list. List the people who run the store. One or two people is typical.
When you add a person to a Managers list, they also get access to the Headquarters facility. Headquarters then works like any other facility on their row. Removing them from the Managers list does not remove Headquarters. To add or remove Headquarters for anyone, edit their Facilities cell on the Manage Users page.
To set the managers:
- Double-click the store’s Managers cell.
- Select one or two people from the list.
- Click Save Changes.
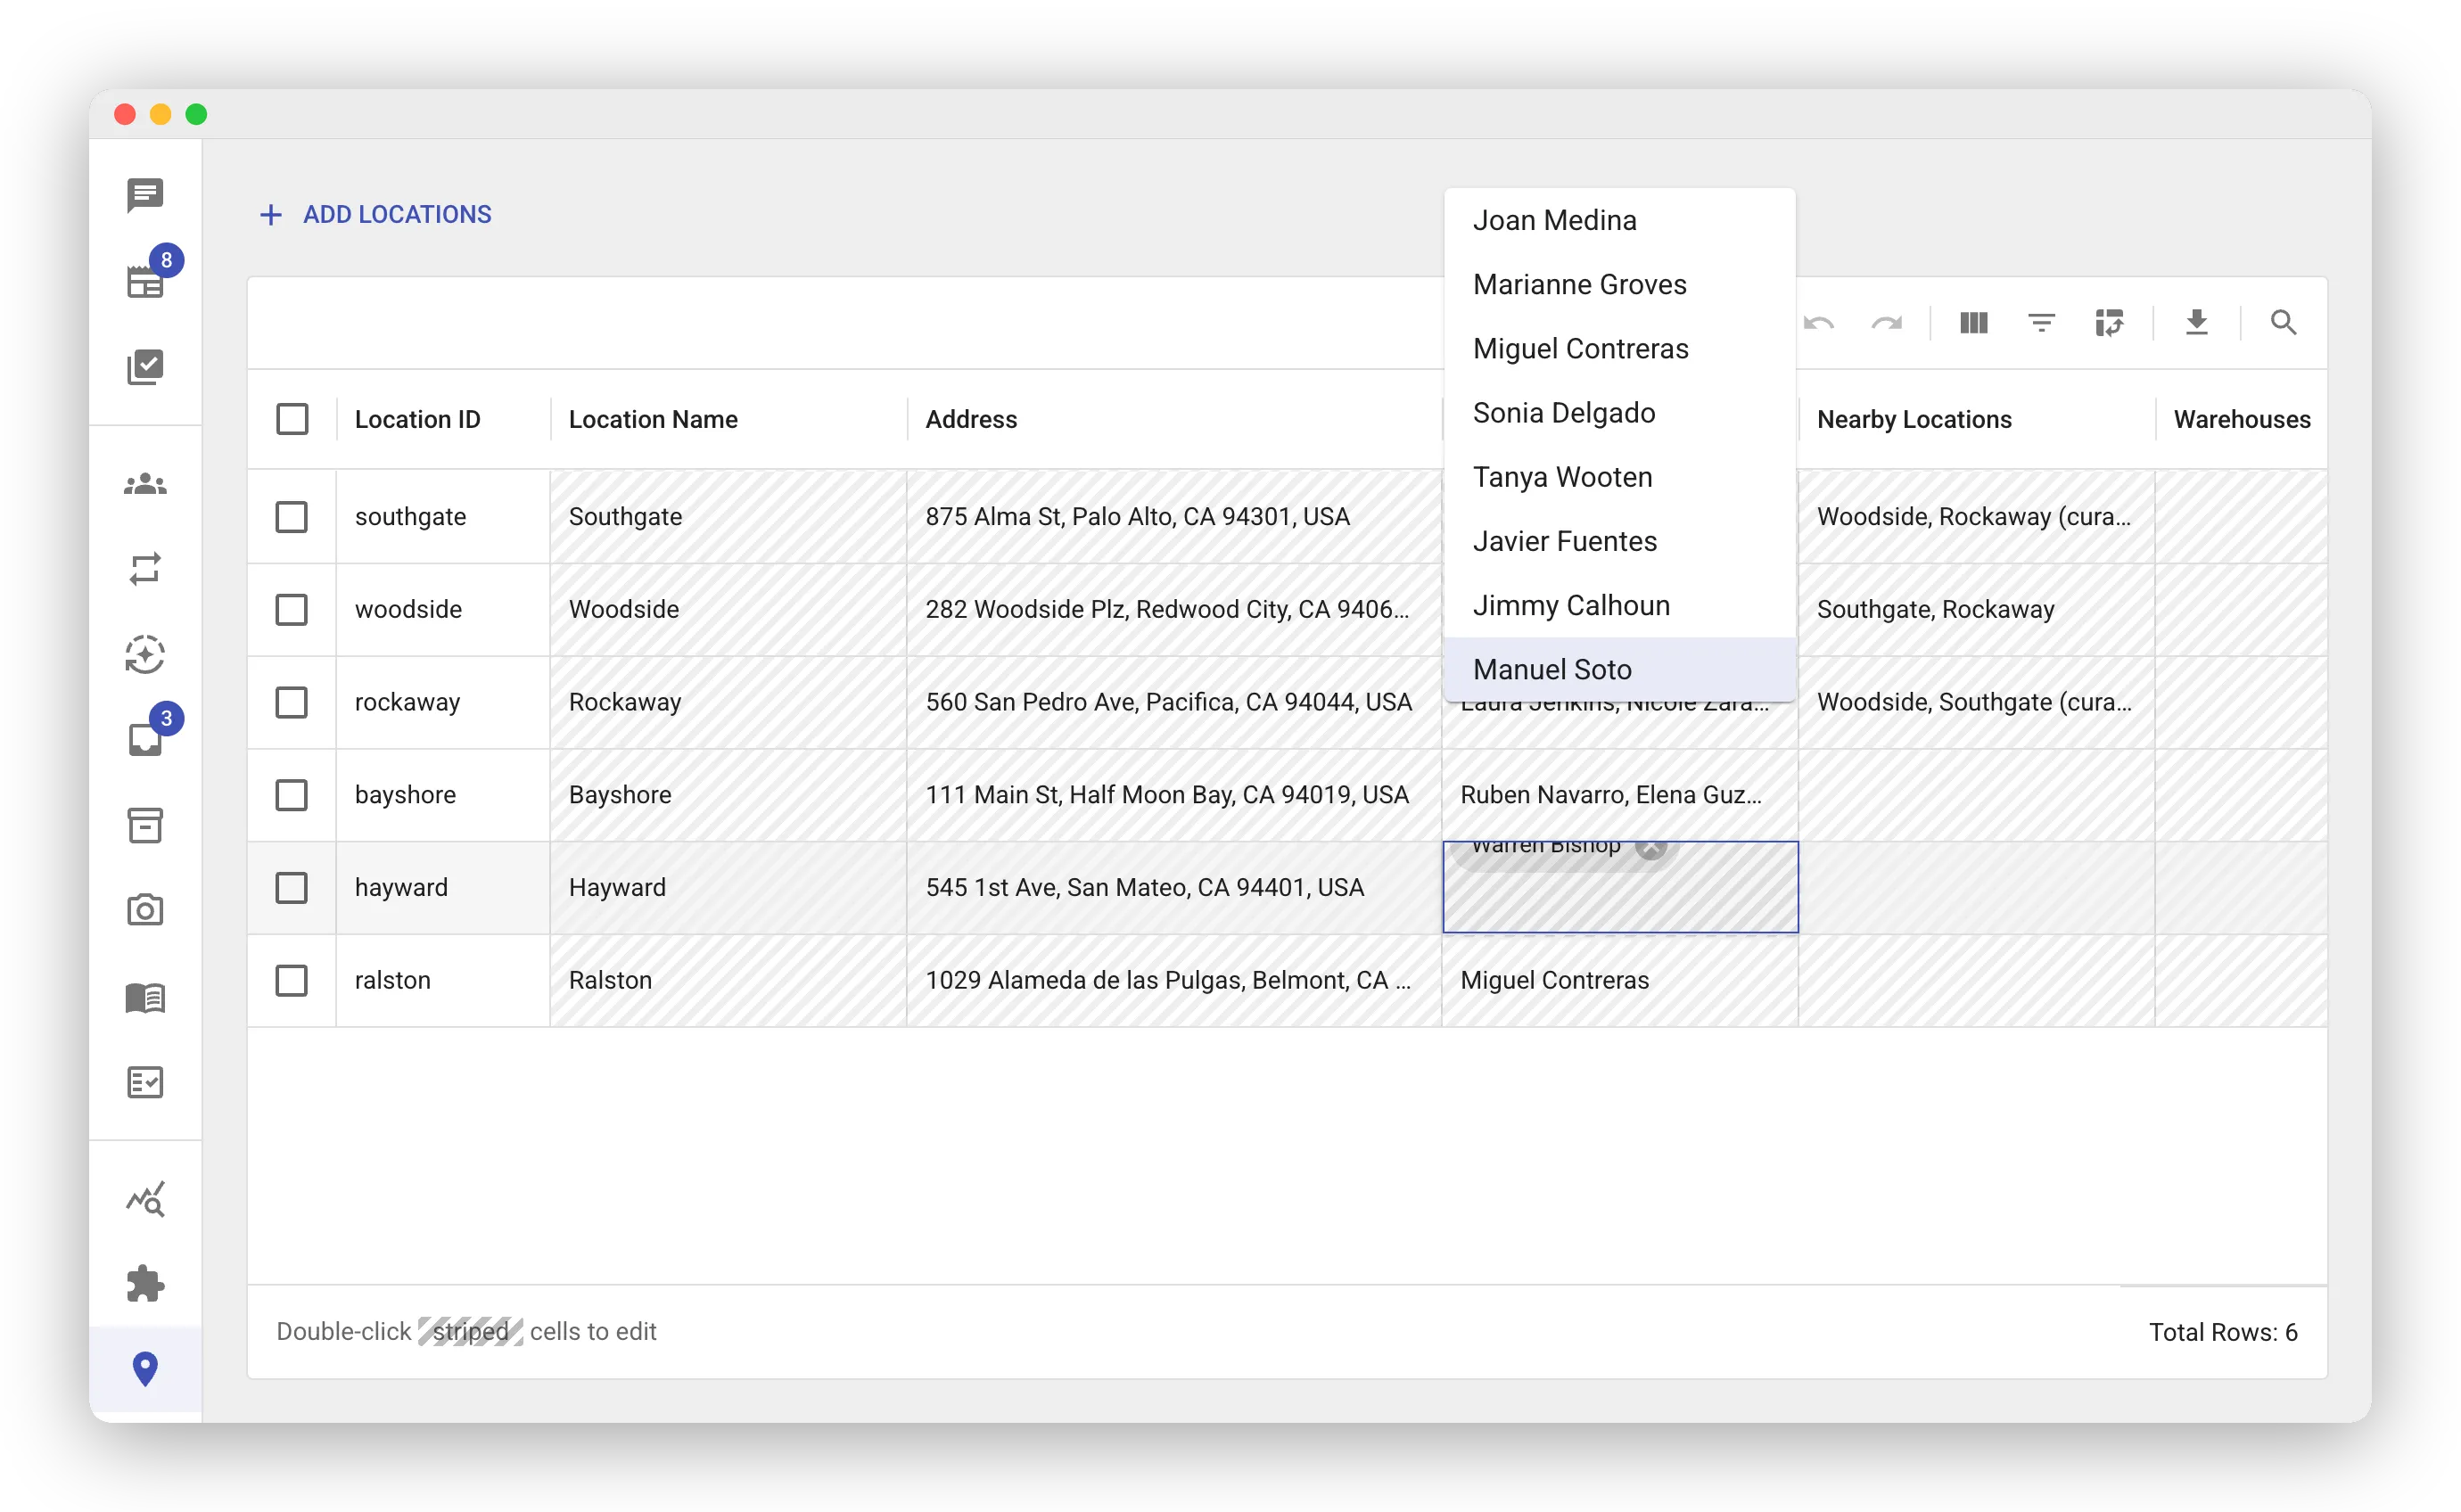
The Managers list does not change what a person can do at the store itself. Assign that with their role and facilities. See Roles and Permissions.
Nearby Locations
Section titled “Nearby Locations”Every store keeps a list of nearby locations. These are sister stores its staff can also work with. When you assign a person a primary store, they also get everyday access to its nearby locations. They can look up inventory, follow tasks, and post to the feed there.
By default the list is geographic. It holds the closest stores by distance. It updates automatically as you add locations.
Curating the list
Section titled “Curating the list”Your stores may group by brand or region rather than distance. In that case, hand-pick any store’s nearby list:
- Double-click the Nearby Locations cell.
- Select the stores.
- Click Save Changes.
A hand-picked list shows a (curated) marker. It stops following geography. New locations do not change it. It is not limited to the closest few stores.
Reviewing the permission changes
Section titled “Reviewing the permission changes”Nearby lists drive store access. Because of this, saving a change opens a Review Location Changes dialog. It lists every affected person. Green entries show access they would gain. Red entries show access they would lose. Some entries simply bring a person back in line with their role. The list can therefore be bigger than your edit. People with hand-customized permissions are marked (custom). Their changes are a careful best effort. Extra access that was granted by hand is kept, shown as =.
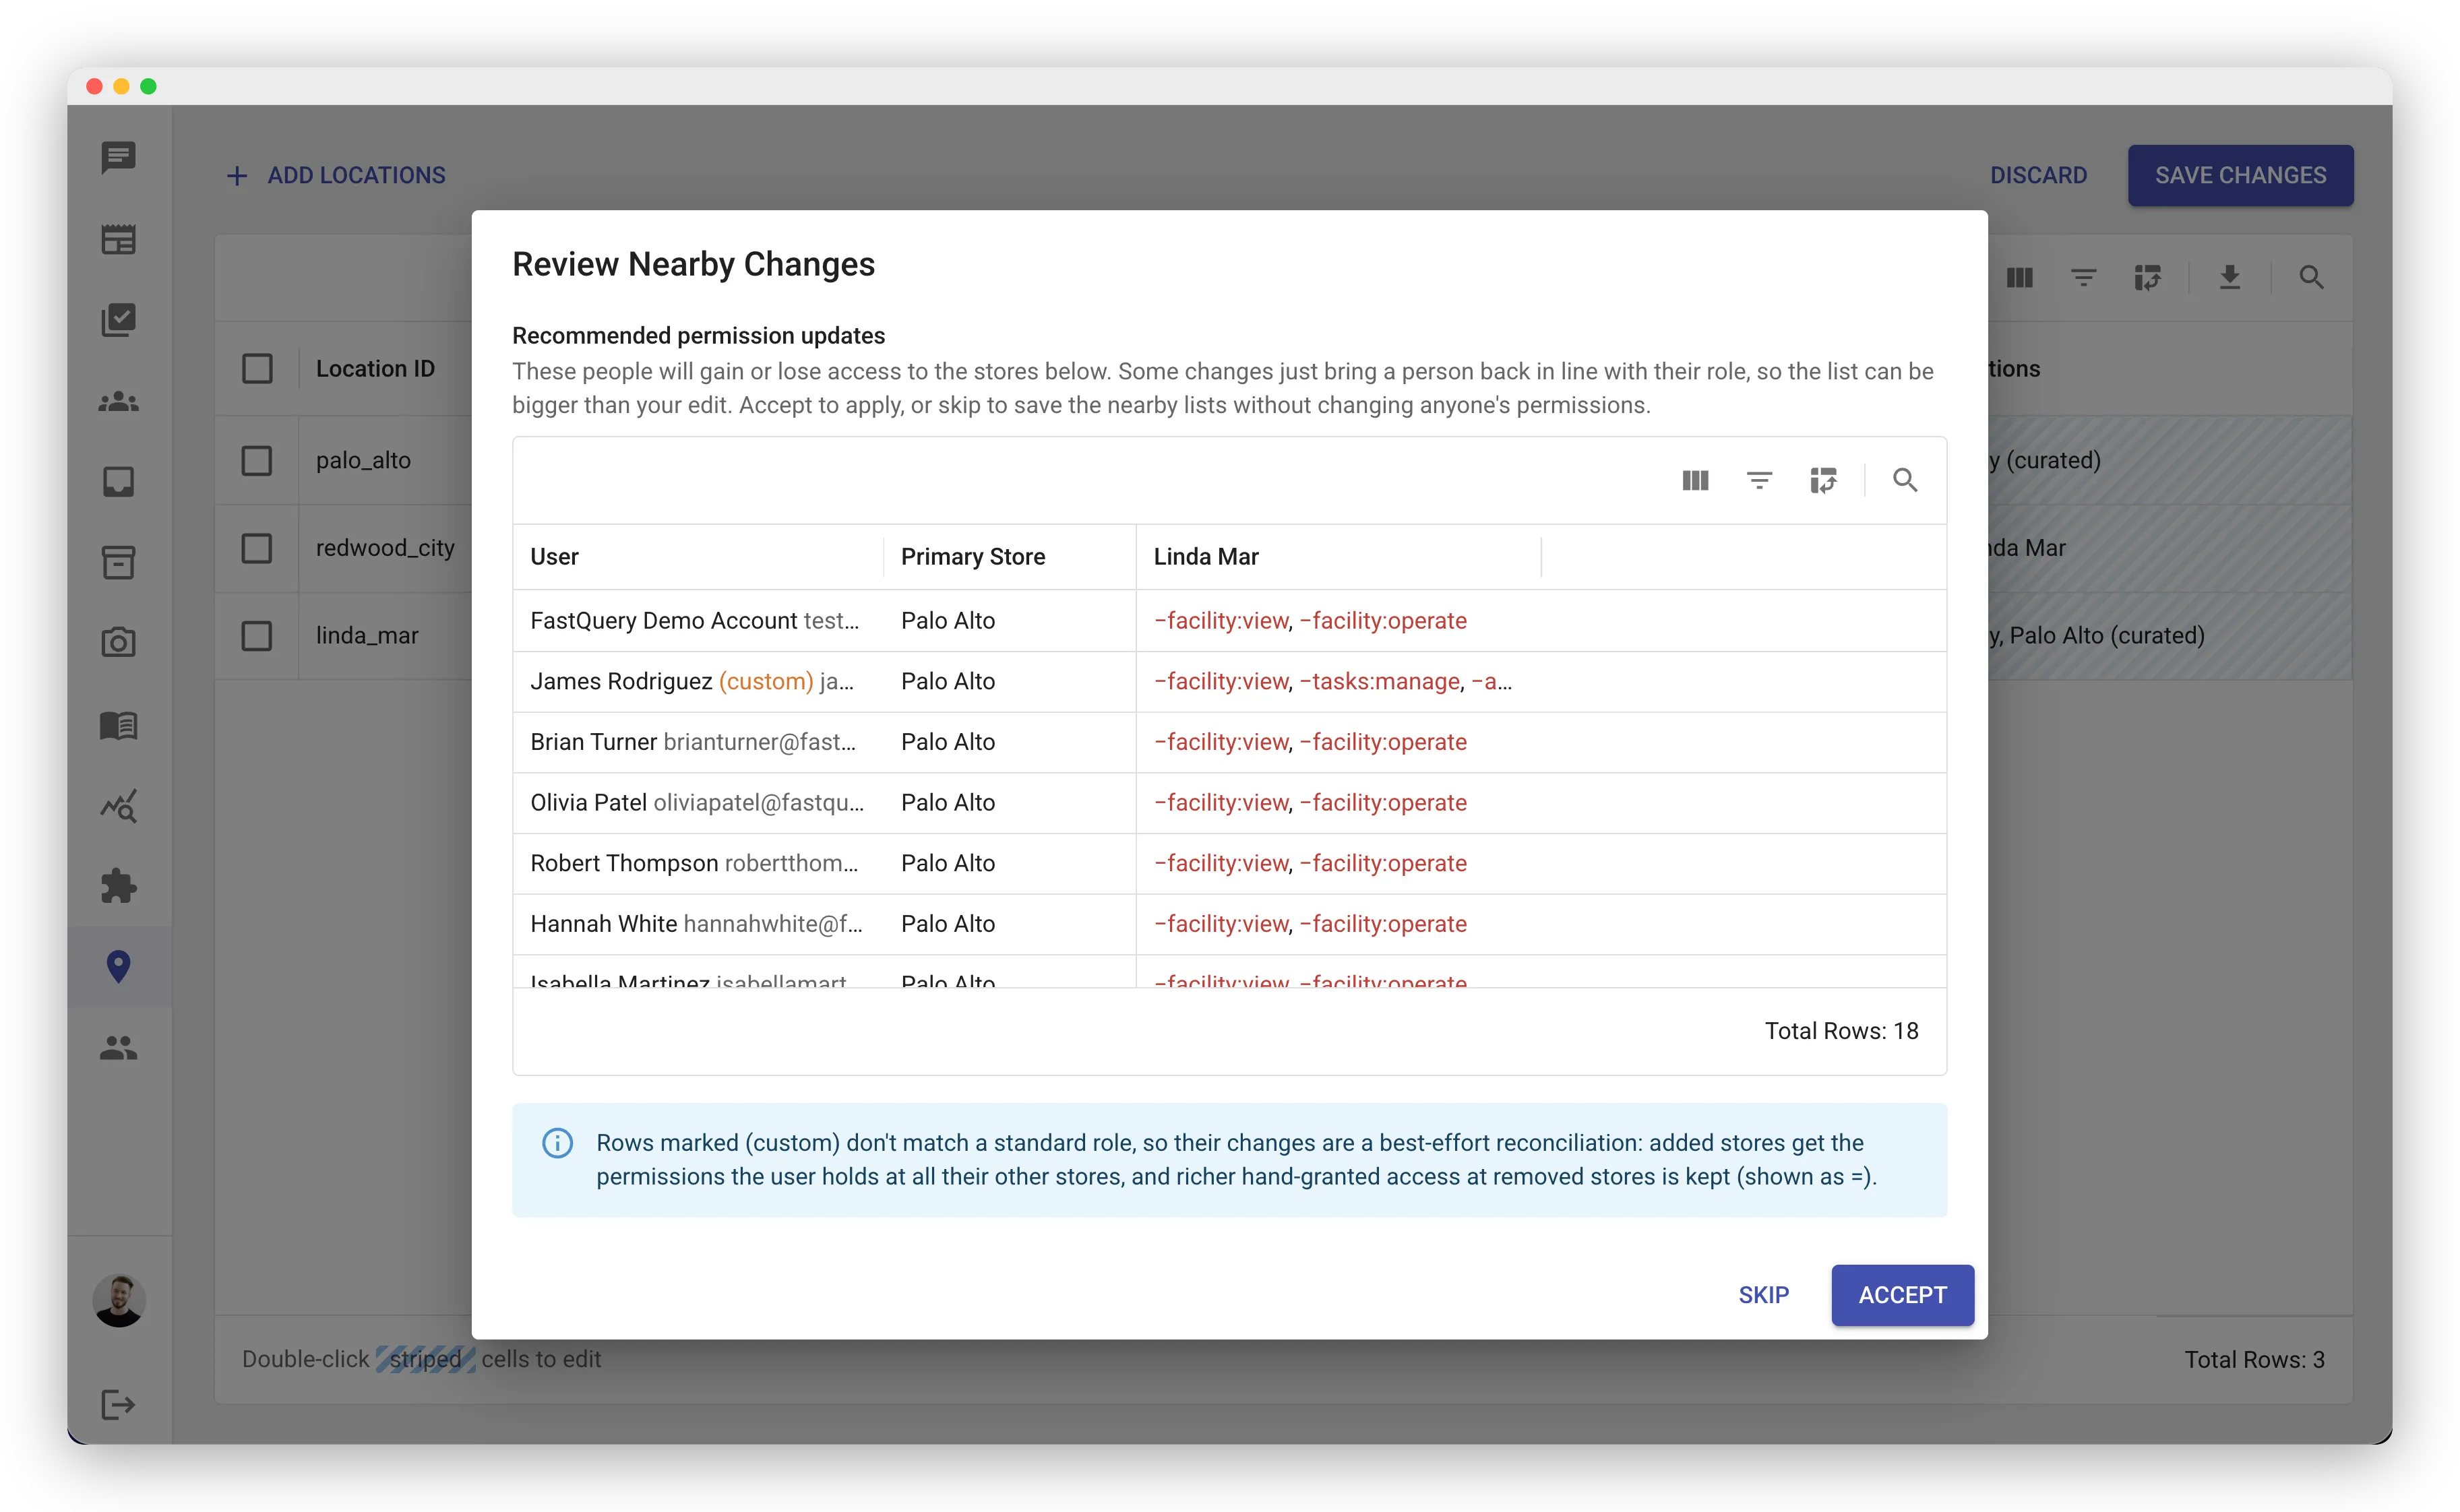
You have two ways to save:
- Accept — saves the nearby lists and applies the permission updates shown.
- Skip — saves the nearby lists but leaves everyone’s permissions exactly as they are.
Warehouses per Store
Section titled “Warehouses per Store”Your organization may have access to more than one supplier warehouse. You can control which warehouses each store works with. Every store has a Warehouses list on the Locations page. By default a store sees every warehouse your organization has access to. That includes any warehouse you are granted later.
Different warehouses may serve different stores. In that case:
- Double-click the store’s Warehouses cell.
- Select the warehouses that serve it.
- Click Save Changes.
A hand-picked list shows the (curated) marker. It stays exactly as you set it. Staff at this store see supplier data only from the warehouses you picked. Newly granted warehouses are not added automatically. A person who works across several stores sees the combined warehouse lists of all their stores.
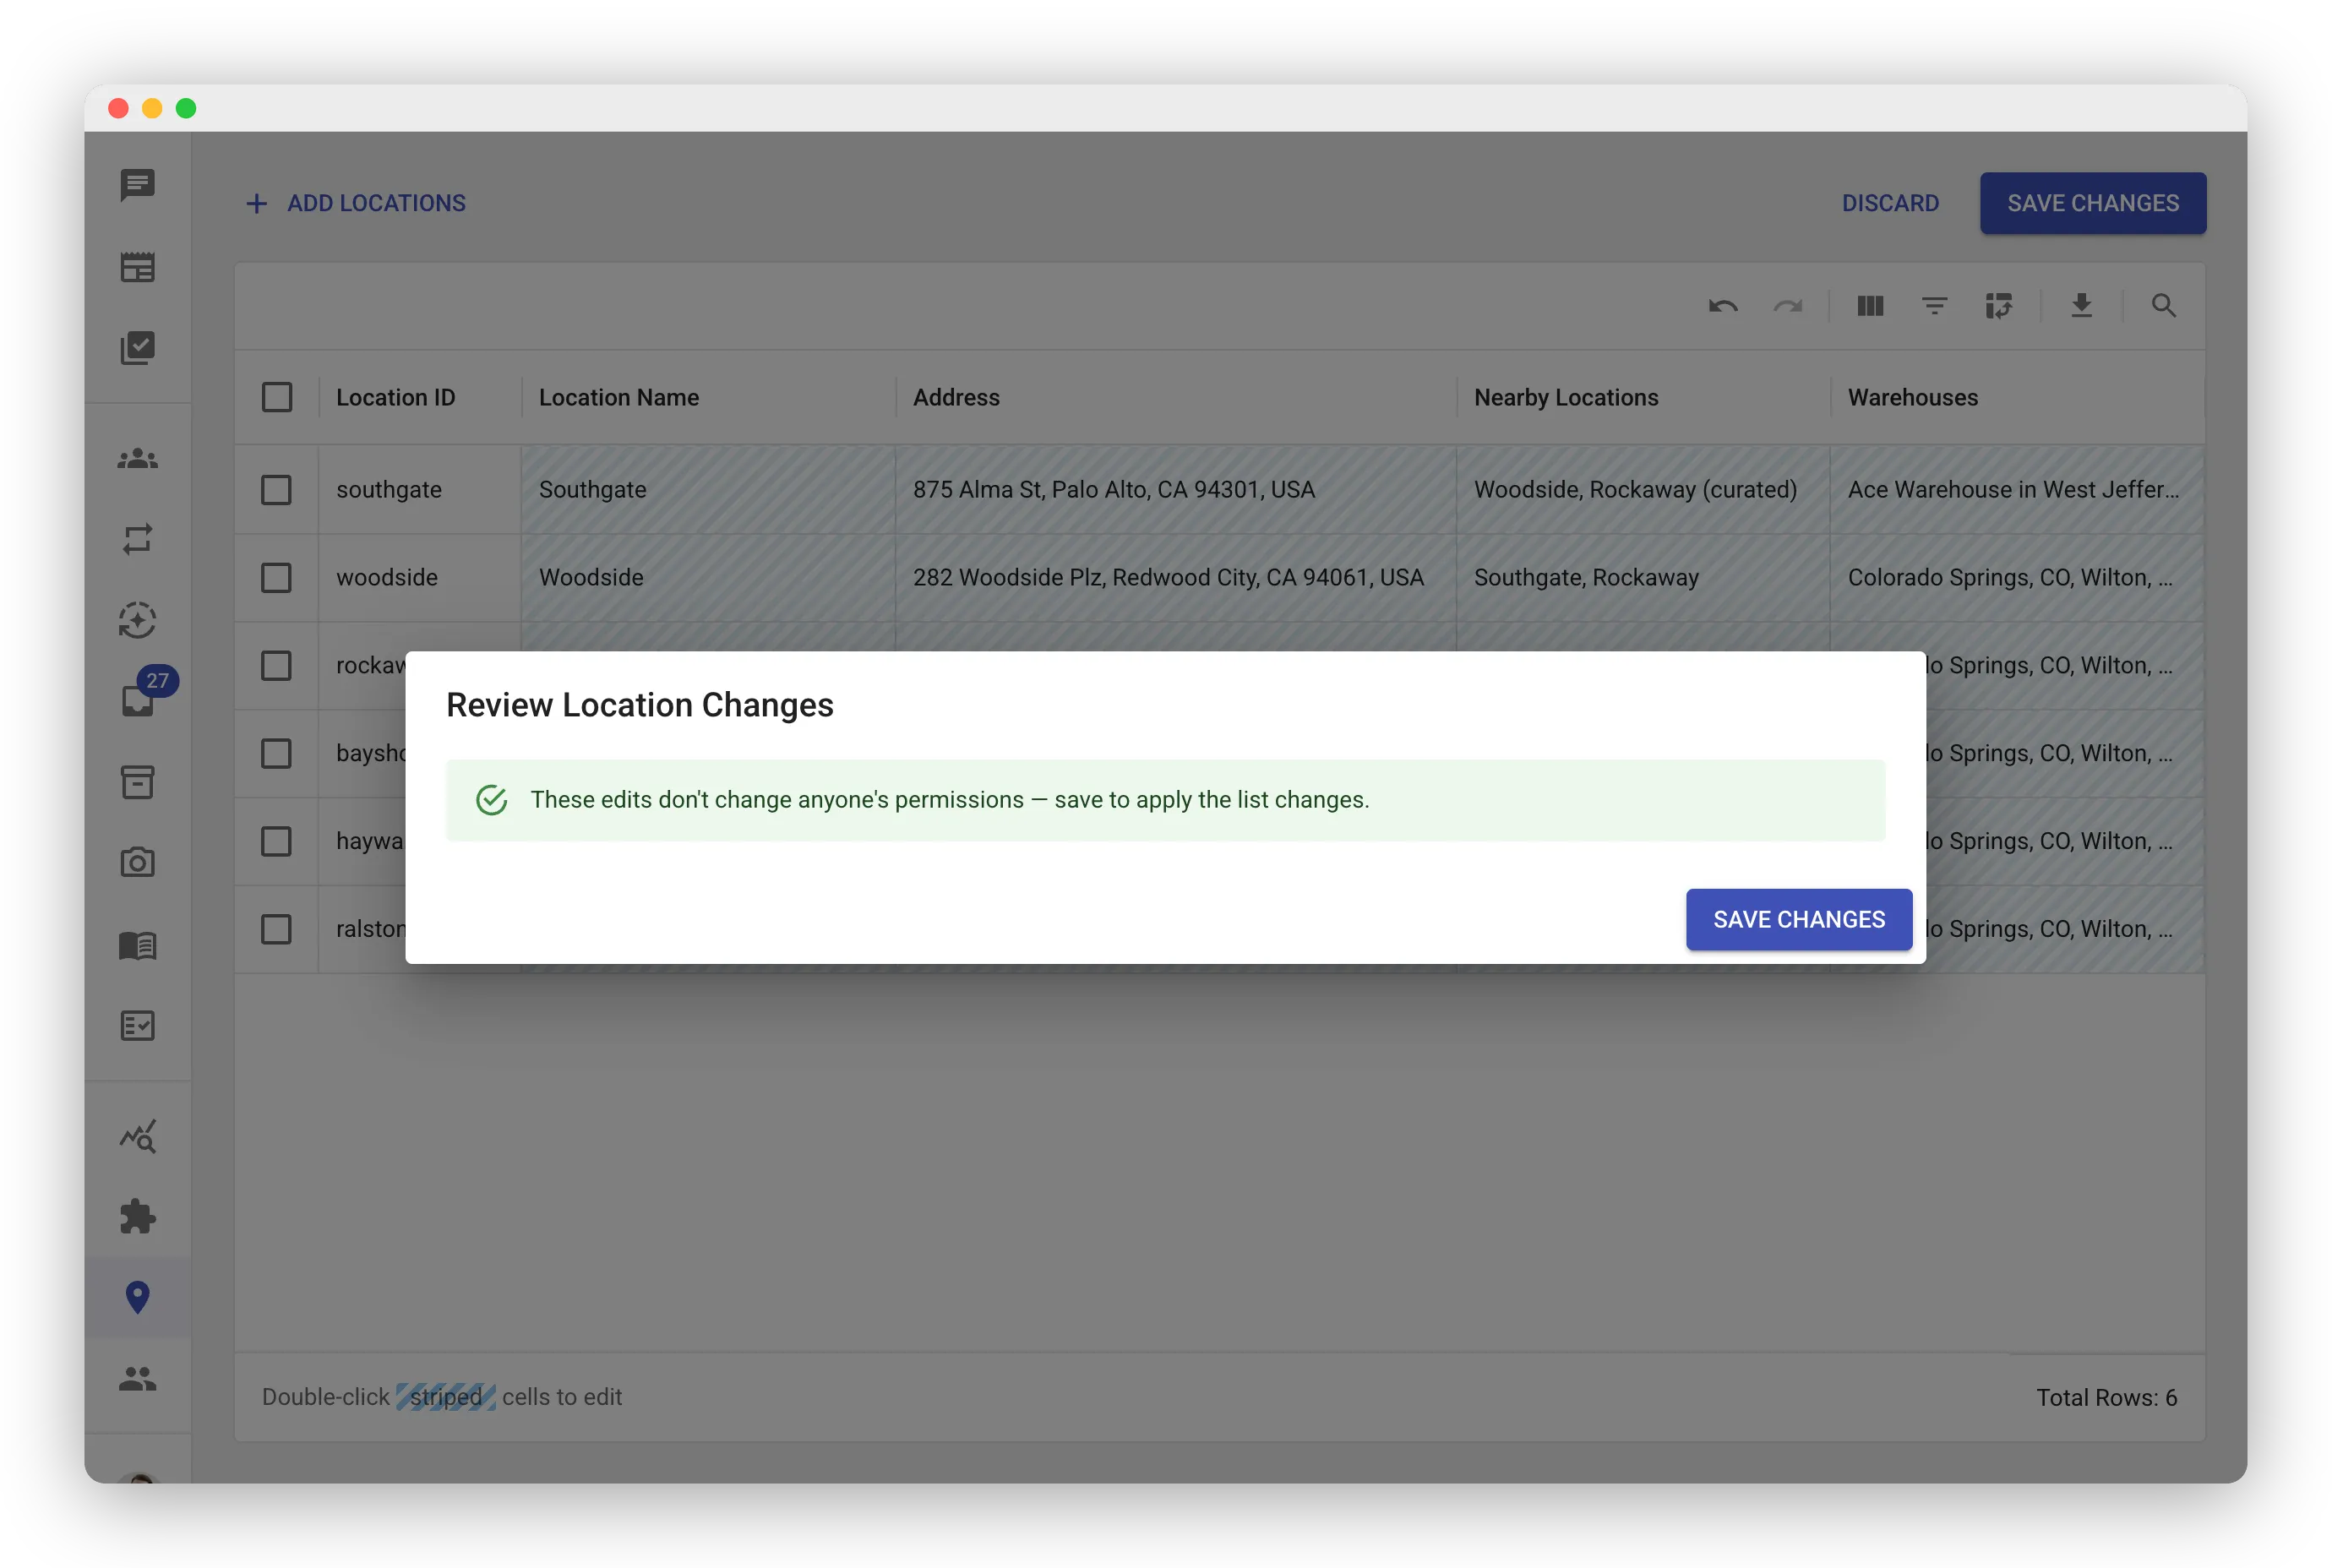
Warehouse visibility follows these lists automatically. There are no per-user warehouse permissions. Saving a warehouse edit opens the same Review Location Changes dialog as nearby edits. No one’s permissions change, so it simply confirms that. Edits reach your team within a few minutes.
How Facilities Affect Access
Section titled “How Facilities Affect Access”Facilities control data access. A person assigned to a facility sees its inventory, tasks, and feed content. They see only their assigned facilities. Their role sets what they can do at the home facility versus other facilities. See Roles and Permissions.
Admins see all facilities.
Primary (home) facility
Section titled “Primary (home) facility”Every person has one primary facility. It is their home store. You set it in the Primary Facility field when you add or edit someone.
The home facility matters for two reasons:
- It is the facility a person lands on by default when they open the app.
- For people with the user role, it is where they can create and manage tasks. At their other facilities, they can view, post, and count. Task creation stays at the home store.
A person’s home facility should be one they are assigned to. To move someone’s home store, edit their Primary Facility on the User Management page.
Each Facility Gets Its Own Data
Section titled “Each Facility Gets Its Own Data”Every facility maintains its own:
- Inventory — synced from your POS system for that store
- Tasks — counting tasks, shelf checks, and other to-dos
- Feed — news and updates relevant to that facility
Your team sees the information that matters to them.