

Picking Tasks
A pick list is something any task can carry: a list of products, each with a quantity to pick, plus a built-in barcode scanner. Think of an e-commerce order to fulfill, a transfer to another store, or staging materials for a contractor job — someone has to walk the store and pull specific quantities off the shelves. A task that includes a pick list is what we call a picking task.
Picking looks a lot like counting, with one key difference: in a count, the target quantity comes from your POS system; in a pick, you set the quantity — it’s how many the order or transfer needs.
flowchart LR
    A["Open\nTask"] --> B["Walk to\nBin"]
    B --> C["Scan\nBarcode"]
    C --> D["Record\nPicked Qty"]
    D --> E{"More\nItems?"}
    E -->|Yes| B
    E -->|No| F["Finalize\nPick"]
How Picking Tasks Work
Section titled “How Picking Tasks Work”A picking task contains a list of products, each with a requested quantity. Your job is to physically pull those items off the shelf and record how many you picked. Each item also shows its current on-hand quantity for context, so you can tell right away when a short pick is a stock problem rather than a search problem.
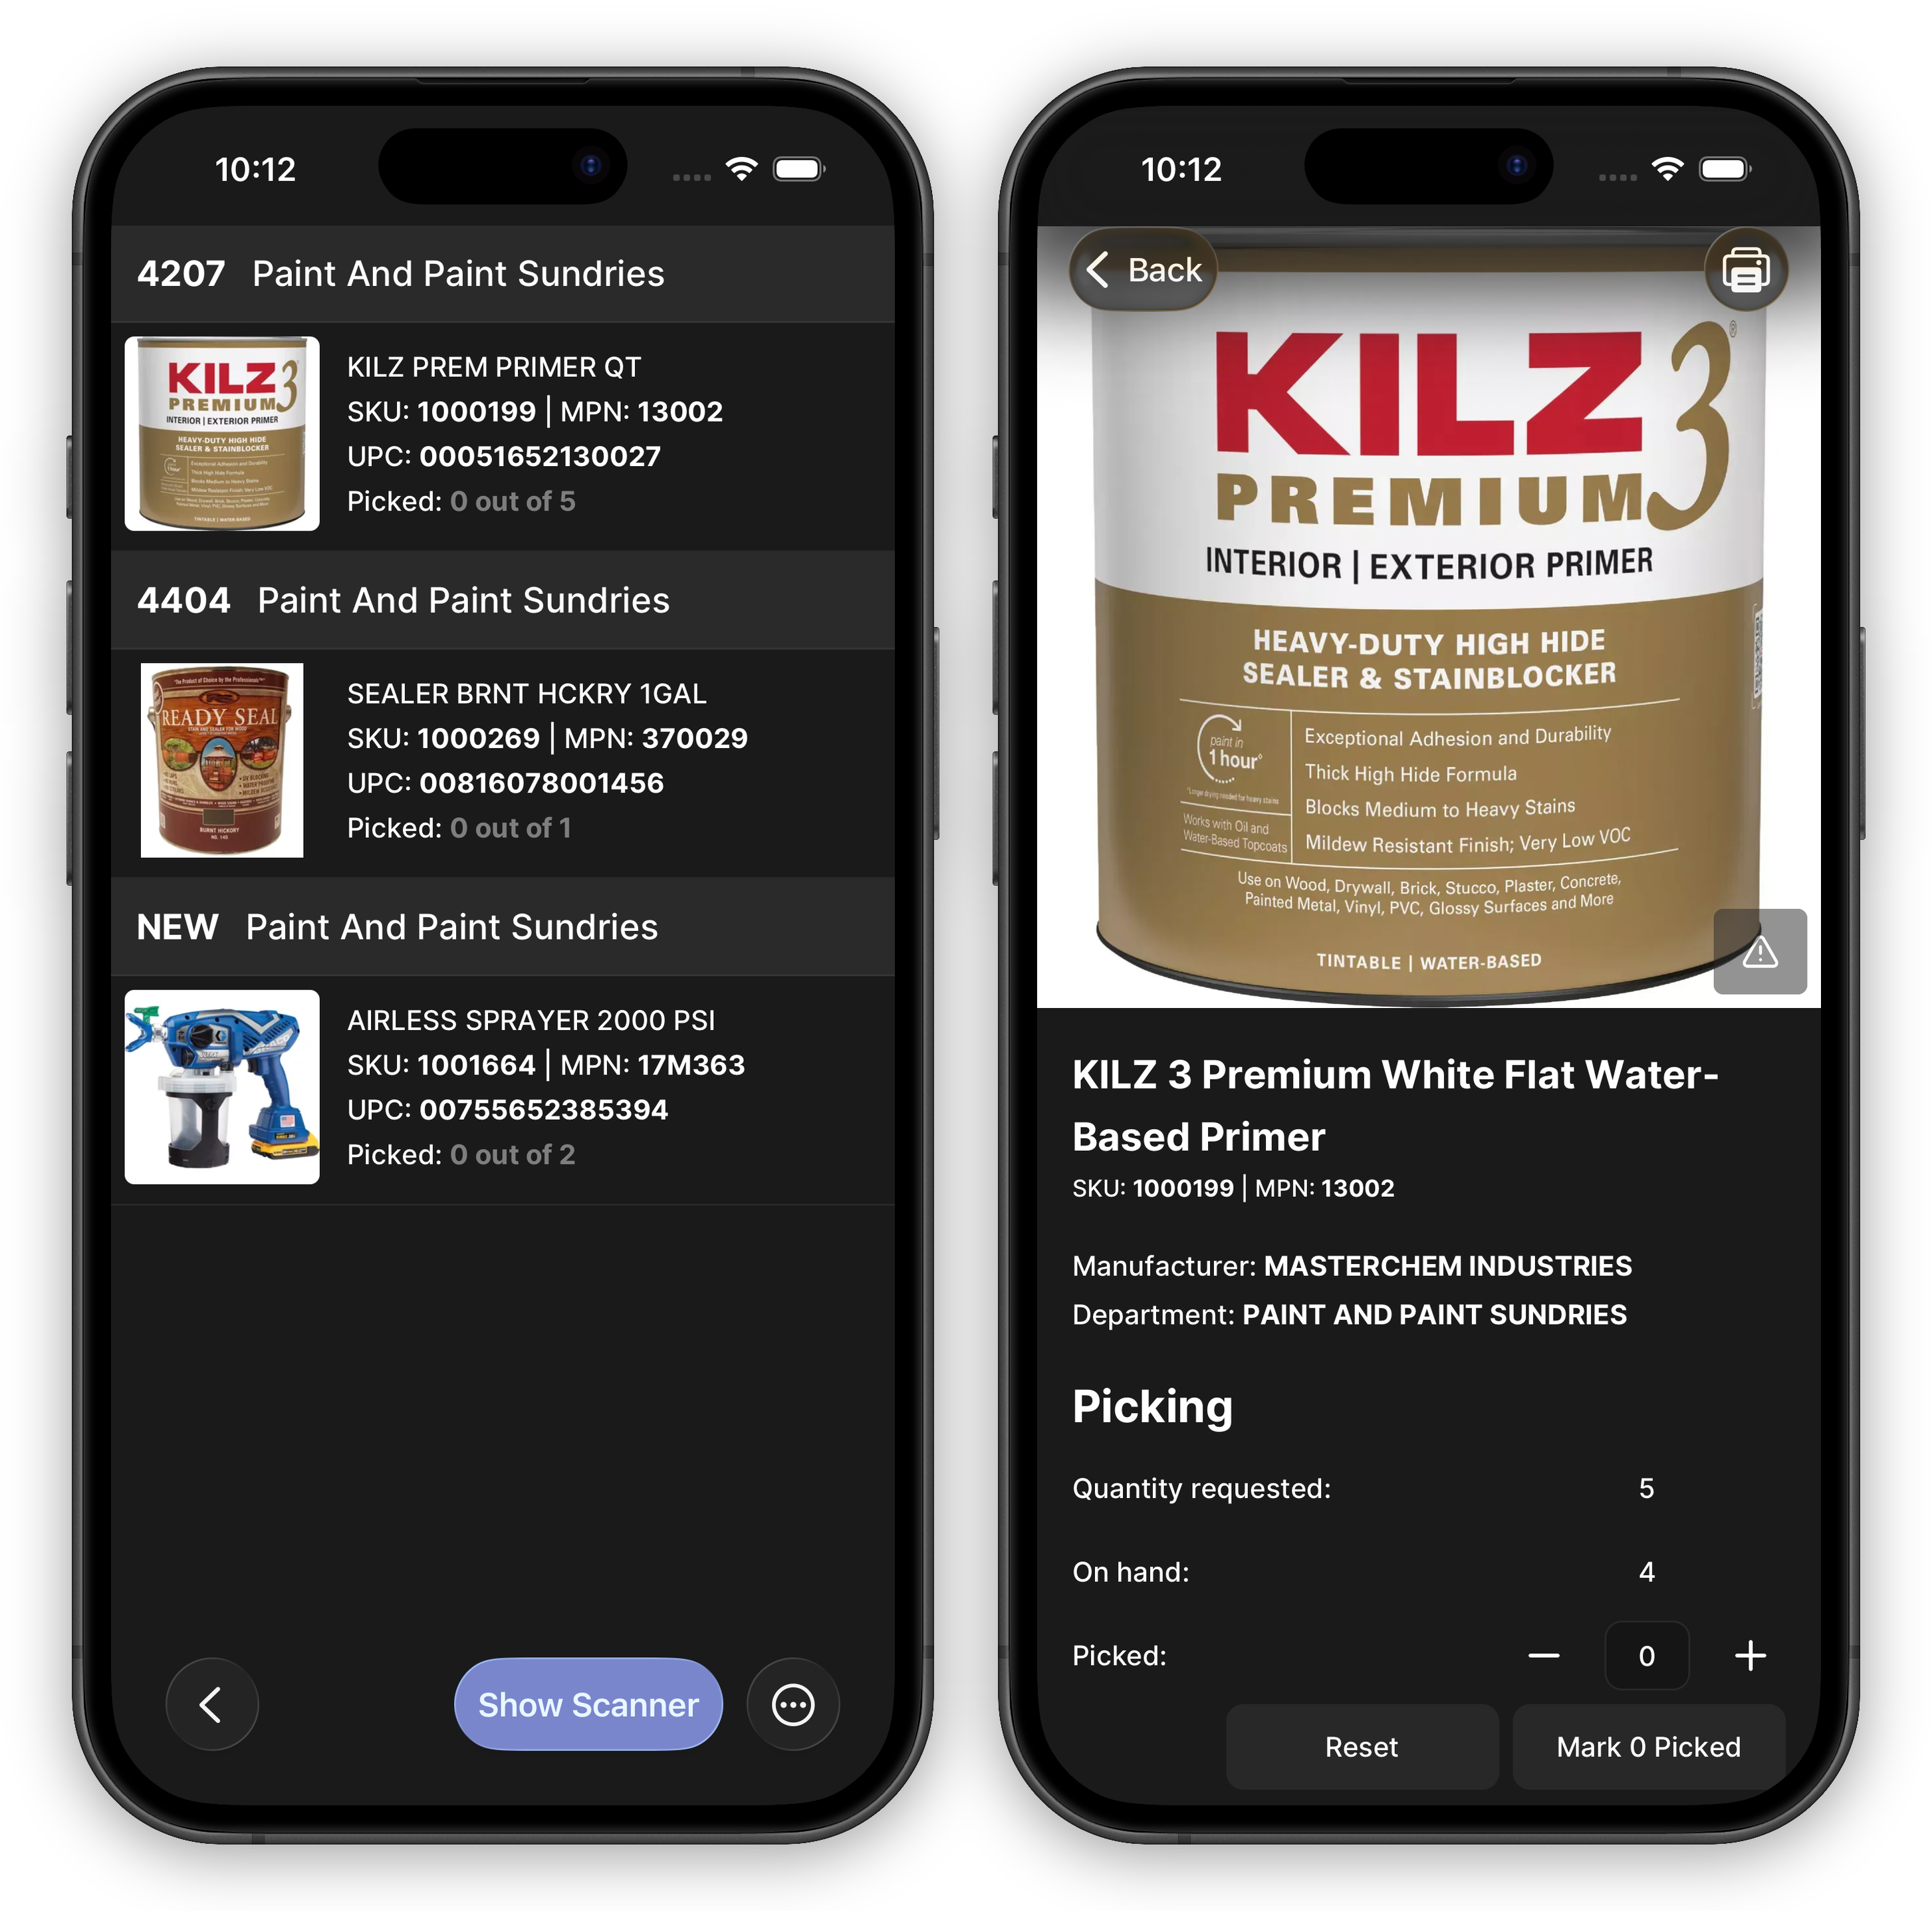
Performing a Pick
Section titled “Performing a Pick”- Open the picking task from your My tab and tap Start Picking
- The pick list shows every product with its requested quantity, sorted by bin so you can work aisle by aisle
- Use the barcode scanner to scan each item as you pull it — each scan adds one to your picked count
- Swipe through items to move to the next product, or use the +/− stepper to enter a quantity directly
- If an item can’t be found or is out of stock, tap Mark 0 Picked so it’s recorded as picked-to-zero rather than untouched — and add a note explaining why
- When you’ve picked everything you can, finalize to send the pick report
On a Zebra handheld, pull the device’s hardware trigger instead of using the camera — the scan behaves exactly the same. If you scan an item that isn’t on the pick list, you’ll hear a miss tone and get a tappable prompt to add it to the list. See Zebra Handheld Scanners.
When several people pick from the same task at once, everyone’s updates appear on each other’s screens in real time, so the team can split up the aisles without stepping on each other.
Understanding the Status Indicators
Section titled “Understanding the Status Indicators”As you pick, each item card shows a color-coded status:
- Green (Complete) — You picked exactly the requested quantity.
- Orange (Partial) — You picked some, but less than requested.
- Blue (Picked) — The item was picked to zero — recorded as unavailable.
- Red (Over-picked) — You picked more than requested. Double-check the quantity.
- Gray (Not Picked) — The item hasn’t been touched yet.
Creating Picking Tasks
Section titled “Creating Picking Tasks”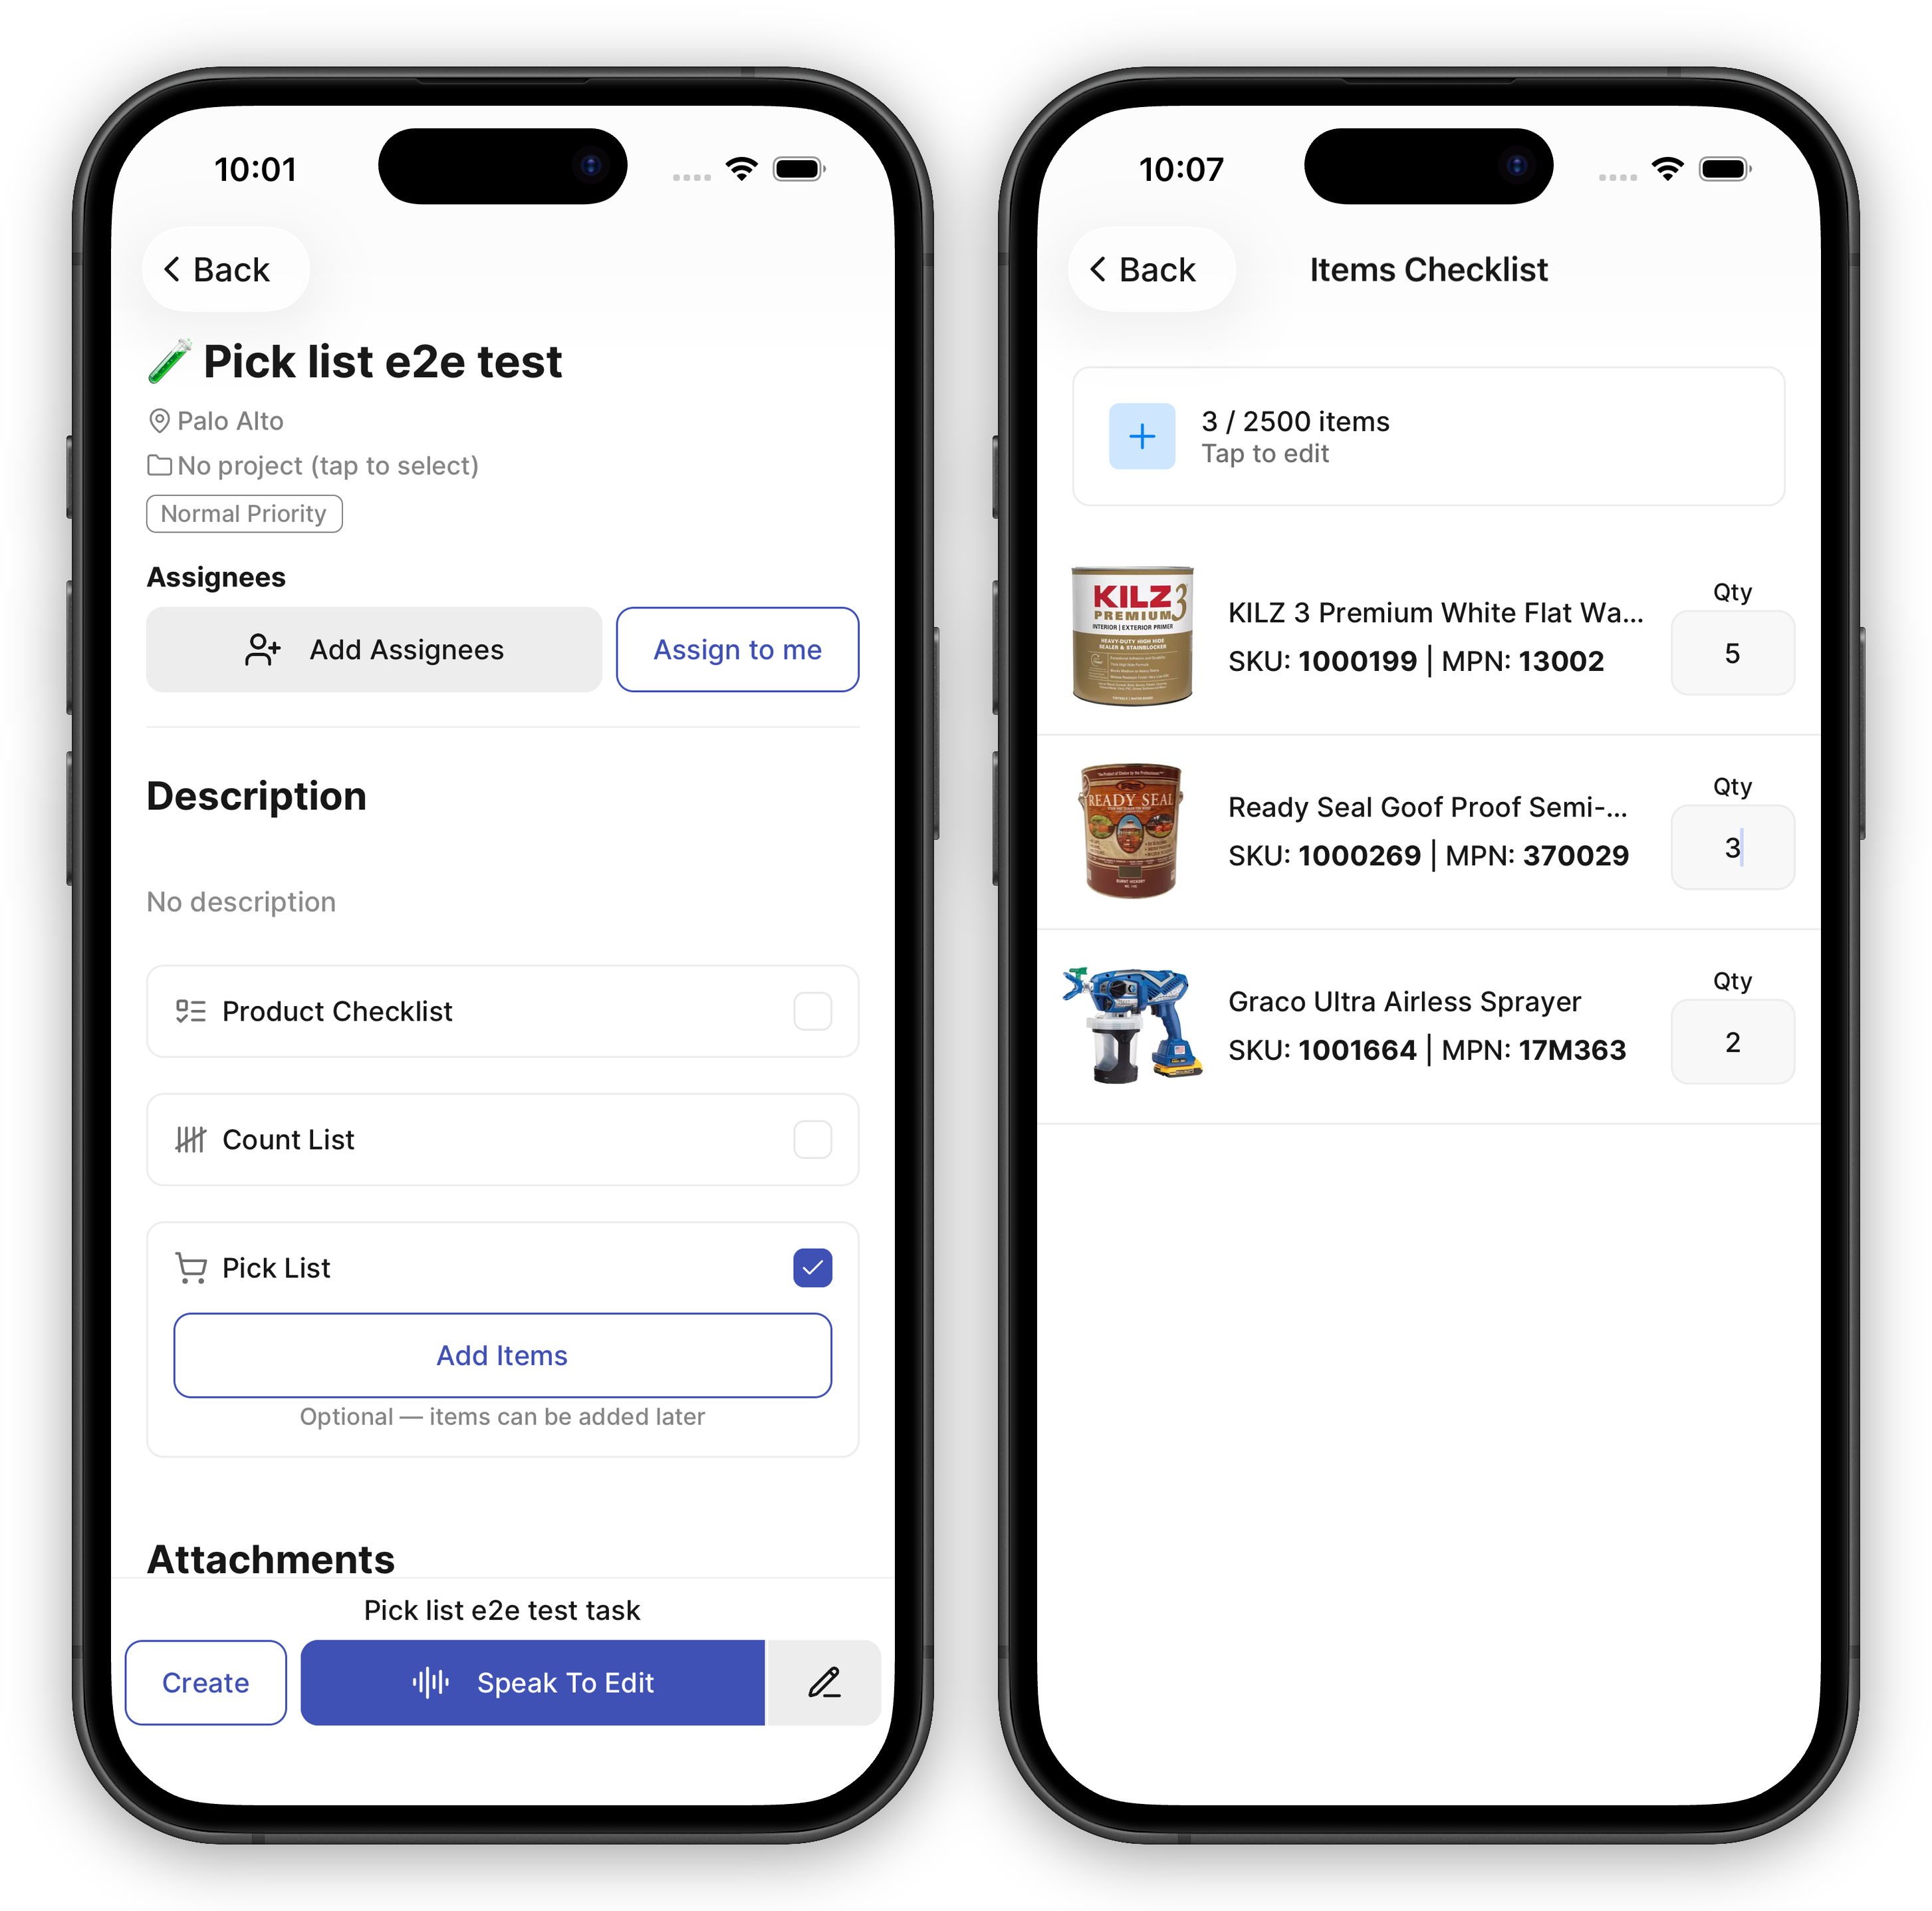
From the Mobile App
Section titled “From the Mobile App”- Create a task and toggle on Pick List
- Tap Add Items and enter the SKUs (or add them later — you can also scan items straight onto the list while picking)
- Set the Qty for each item — this is the quantity to pick; it defaults to 1
From the Web App
Section titled “From the Web App”Open a task in the web app, enable the pick list, and manage the items in a grid — paste in SKUs, edit the Requested column inline, and export the list to CSV. The task view shows the same live grid the pickers are filling in: picked quantities and notes are editable there for desk corrections, finalized rounds appear as their own blocks, and you can finalize or re-finalize straight from the page.
From the AI Assistant
Section titled “From the AI Assistant”Ask the AI in plain language — for example, “Create a pick task for the Oakville transfer: 5 of SKU 1000199, 3 of 1000269” or paste an order straight into the chat. The AI drafts the task and asks you to confirm before creating it.
On a Schedule
Section titled “On a Schedule”Pick lists work with recurring tasks: a schedule remembers the SKUs and quantities, and each generated task starts fresh with the full list to pick — useful for standing weekly transfers or recurring replenishment runs.
Finalizing a Pick
Section titled “Finalizing a Pick”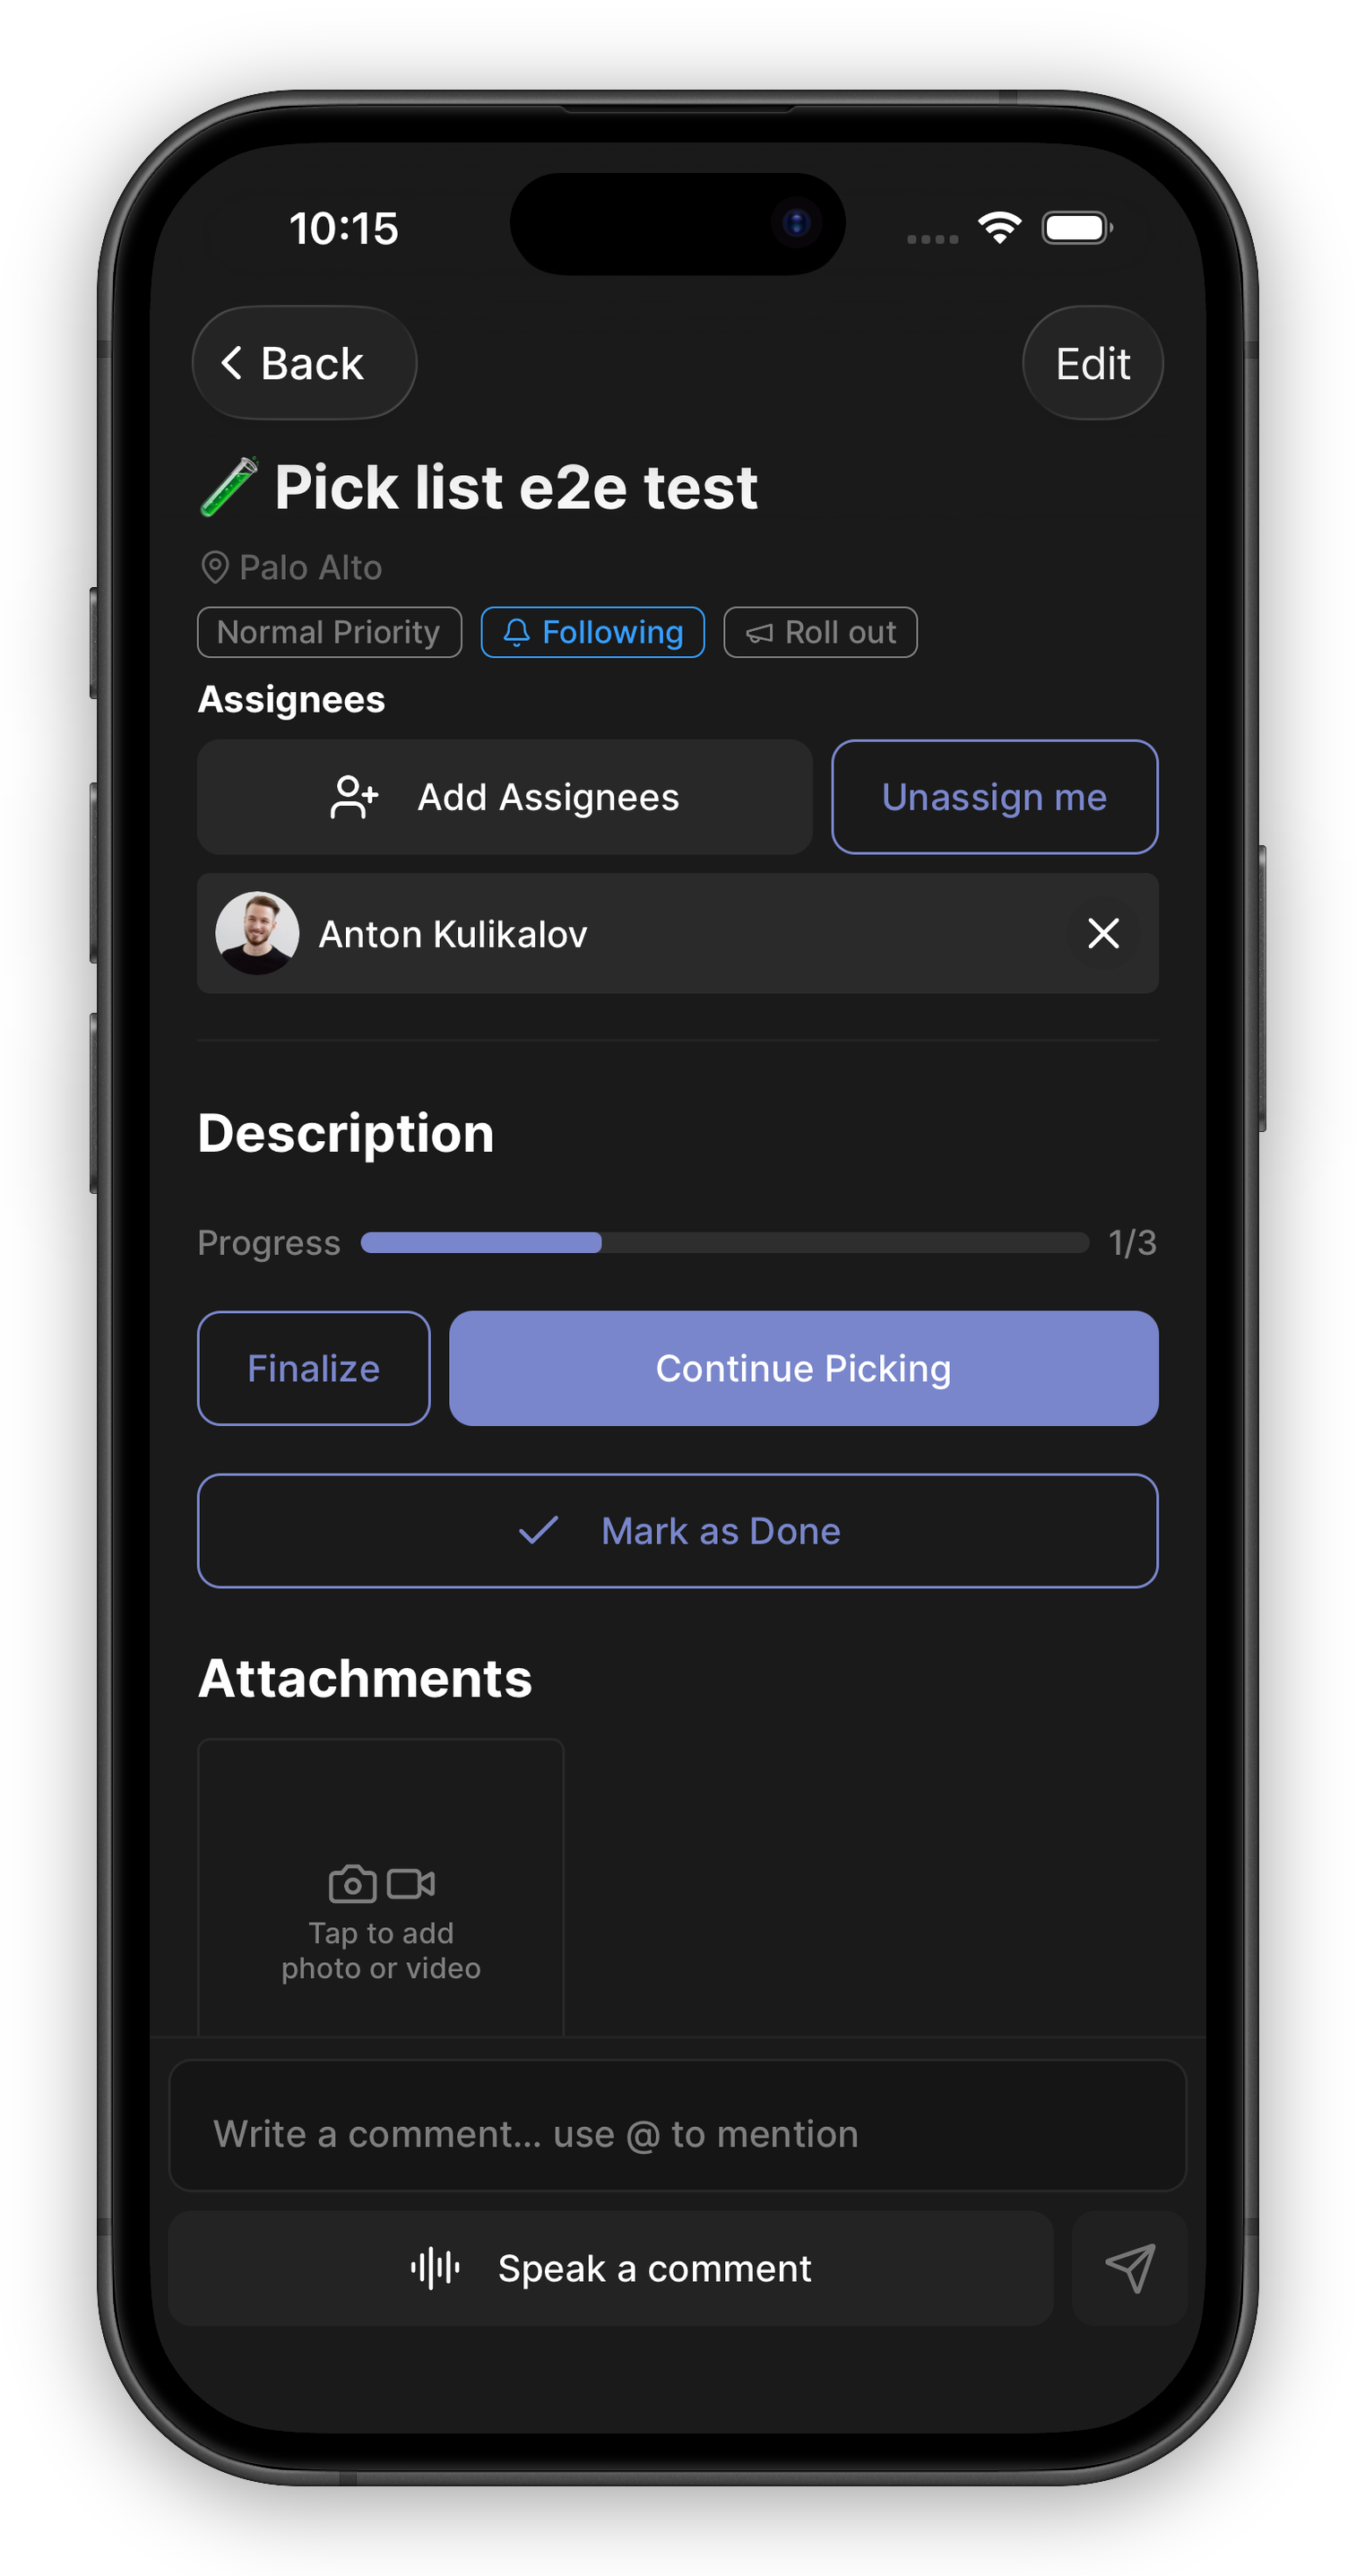
When you’re ready, tap Finalize to close out the items you’ve picked so far. This:
- Moves those items into a finalized batch (they stay editable — re-finalize the batch to resend its corrected report)
- Generates a summary report showing what was requested, what was picked, and any short or over picks
- Emails the report to the addresses you choose, along with a contributors file showing who picked what
You don’t have to pick everything before finalizing — untouched items stay open in the same task, and you can pick and finalize them in a later round. Finalizing never completes the task: mark it done whenever the work is finished, even with items left unpicked.