User Management
As an admin, you can manage everyone on your team from the Users page in the web app. This is where you add new people, update their access, and keep your roster current.
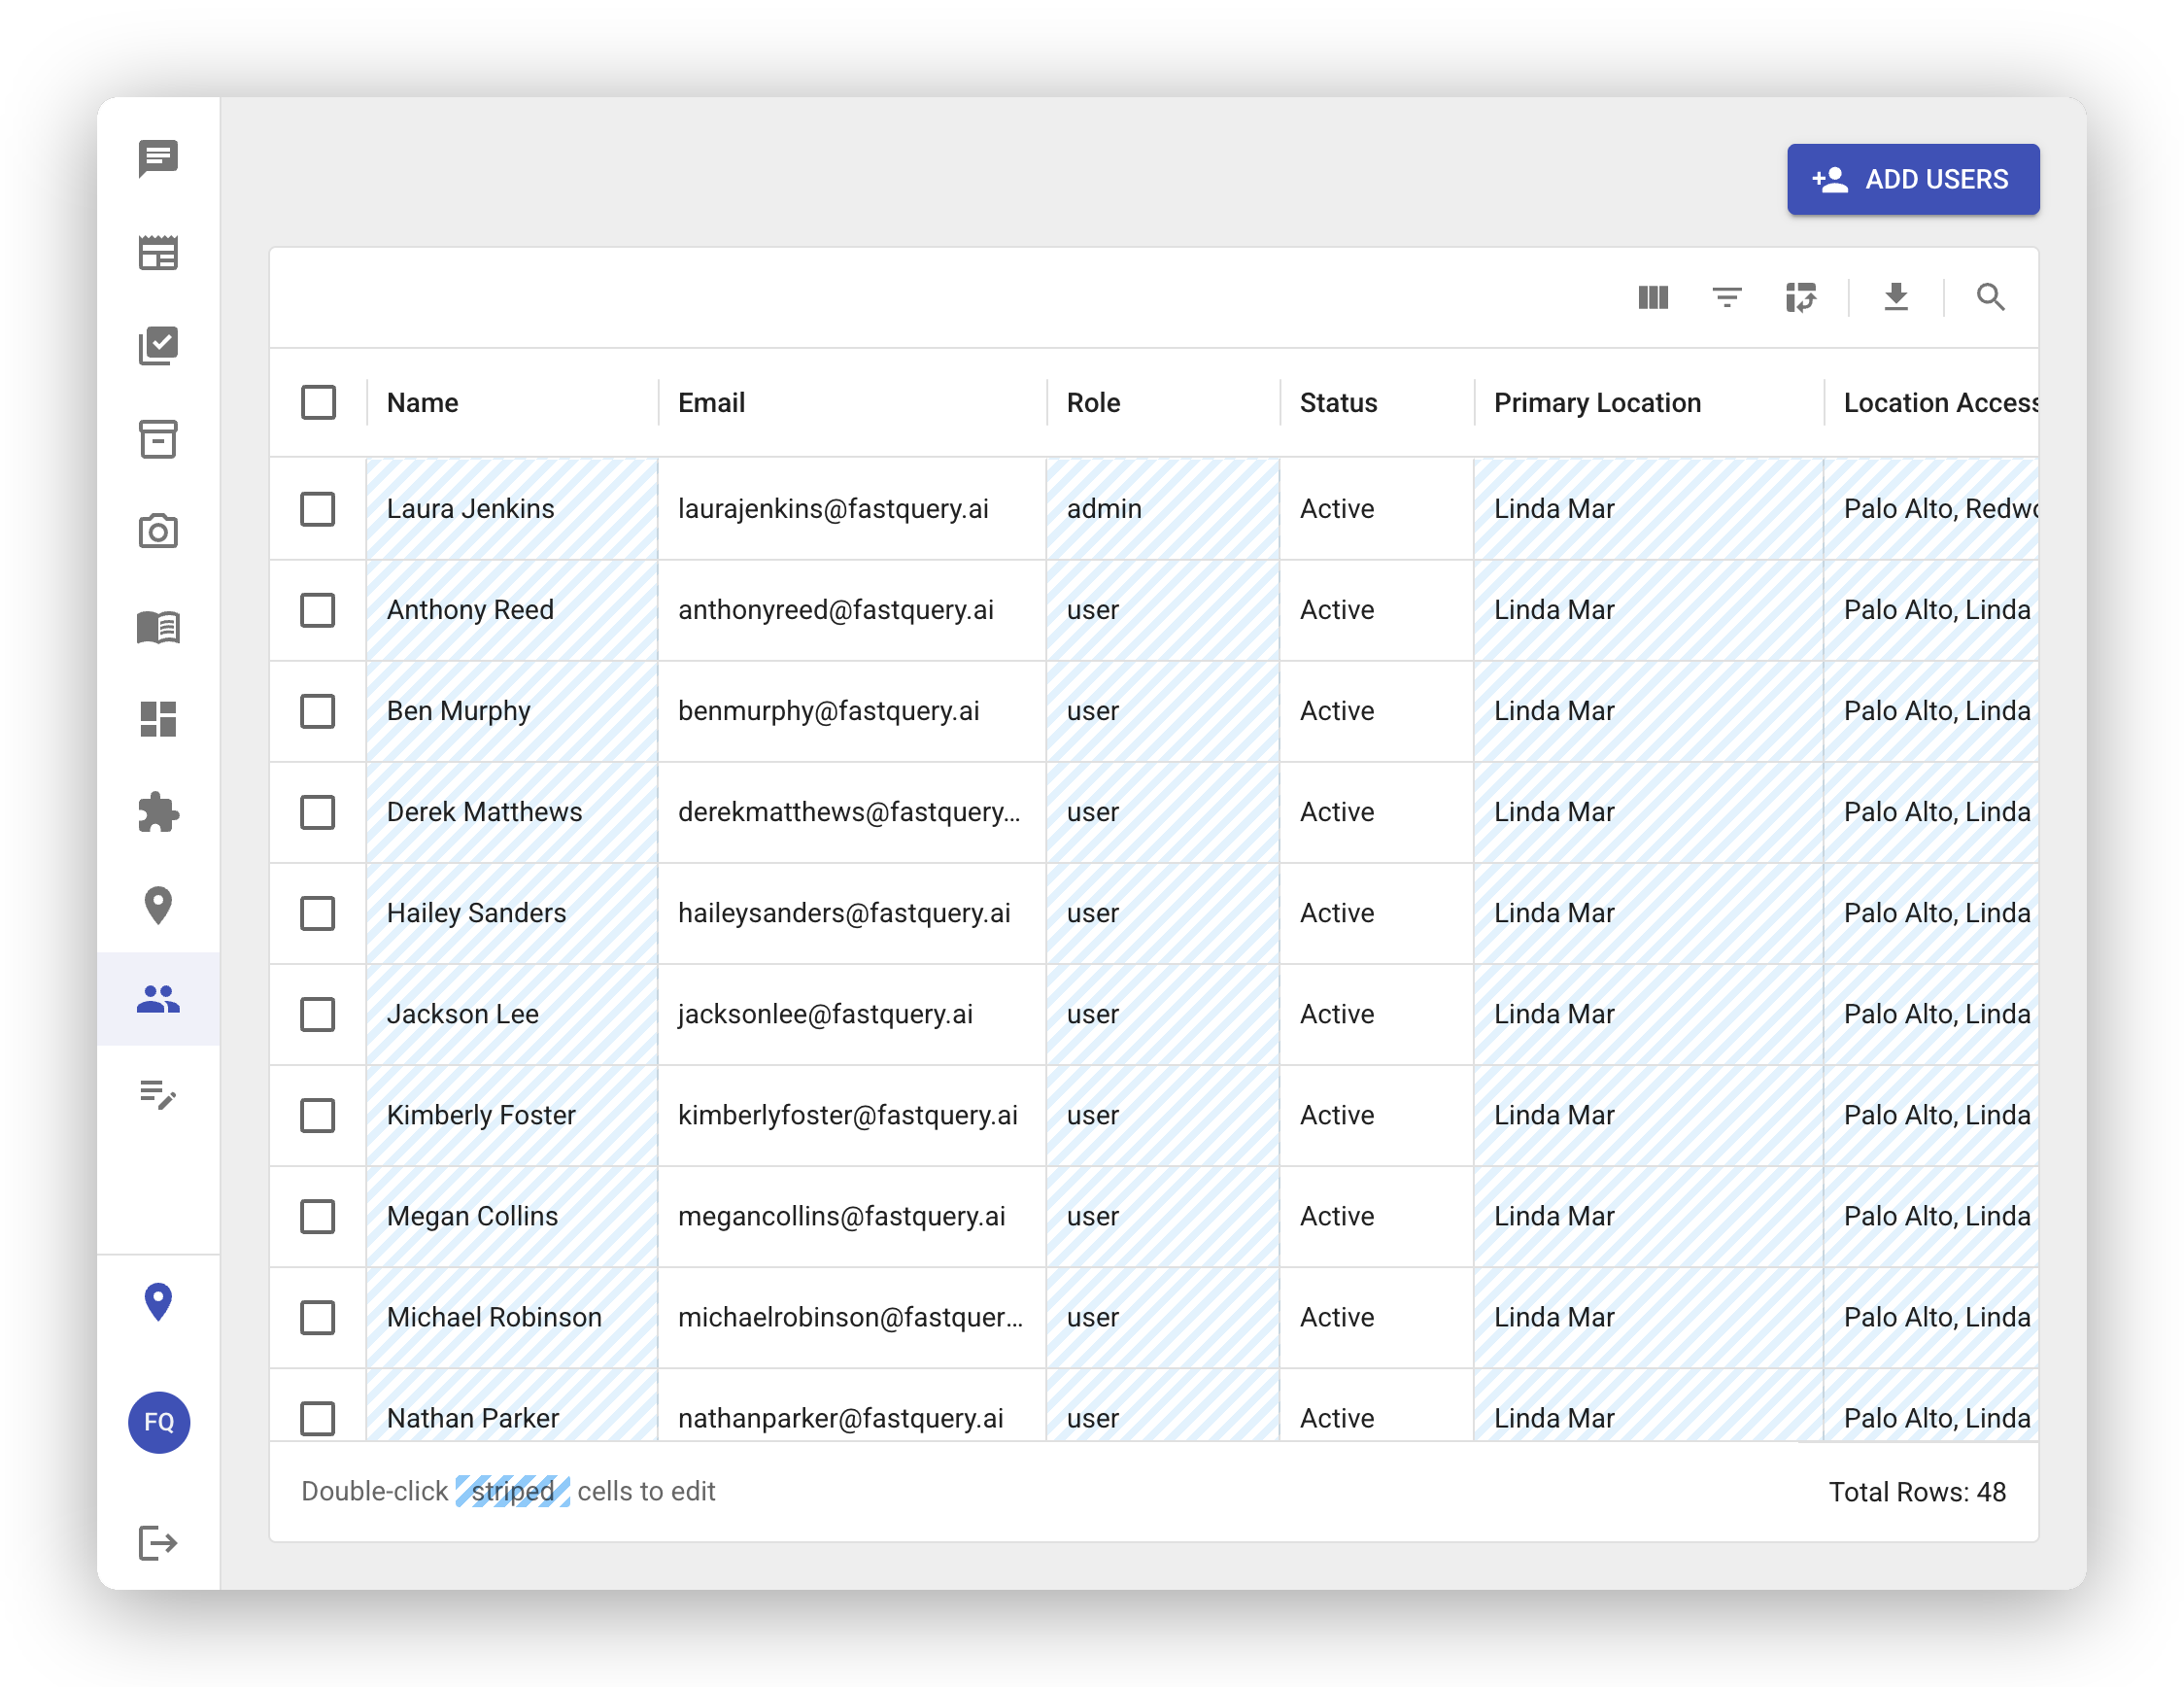
Viewing Your Team
Section titled “Viewing Your Team”The Users page shows a list of everyone in your organization. You can see each person’s name, email, role, assigned facilities, and when they last logged in.
Adding a New User
Section titled “Adding a New User”To add someone to your team:
- Go to the Users page and click Add Users.
- Enter their name and email address.
- Choose a role (Admin, Manager, or User). The role is a starting point — you can fine-tune exactly what each person can do in the Permissions column. See Customizing access.
- Assign them to one or more facilities, and set their Primary Location (home facility).
- Click Save — they’ll receive an email invitation to get started.
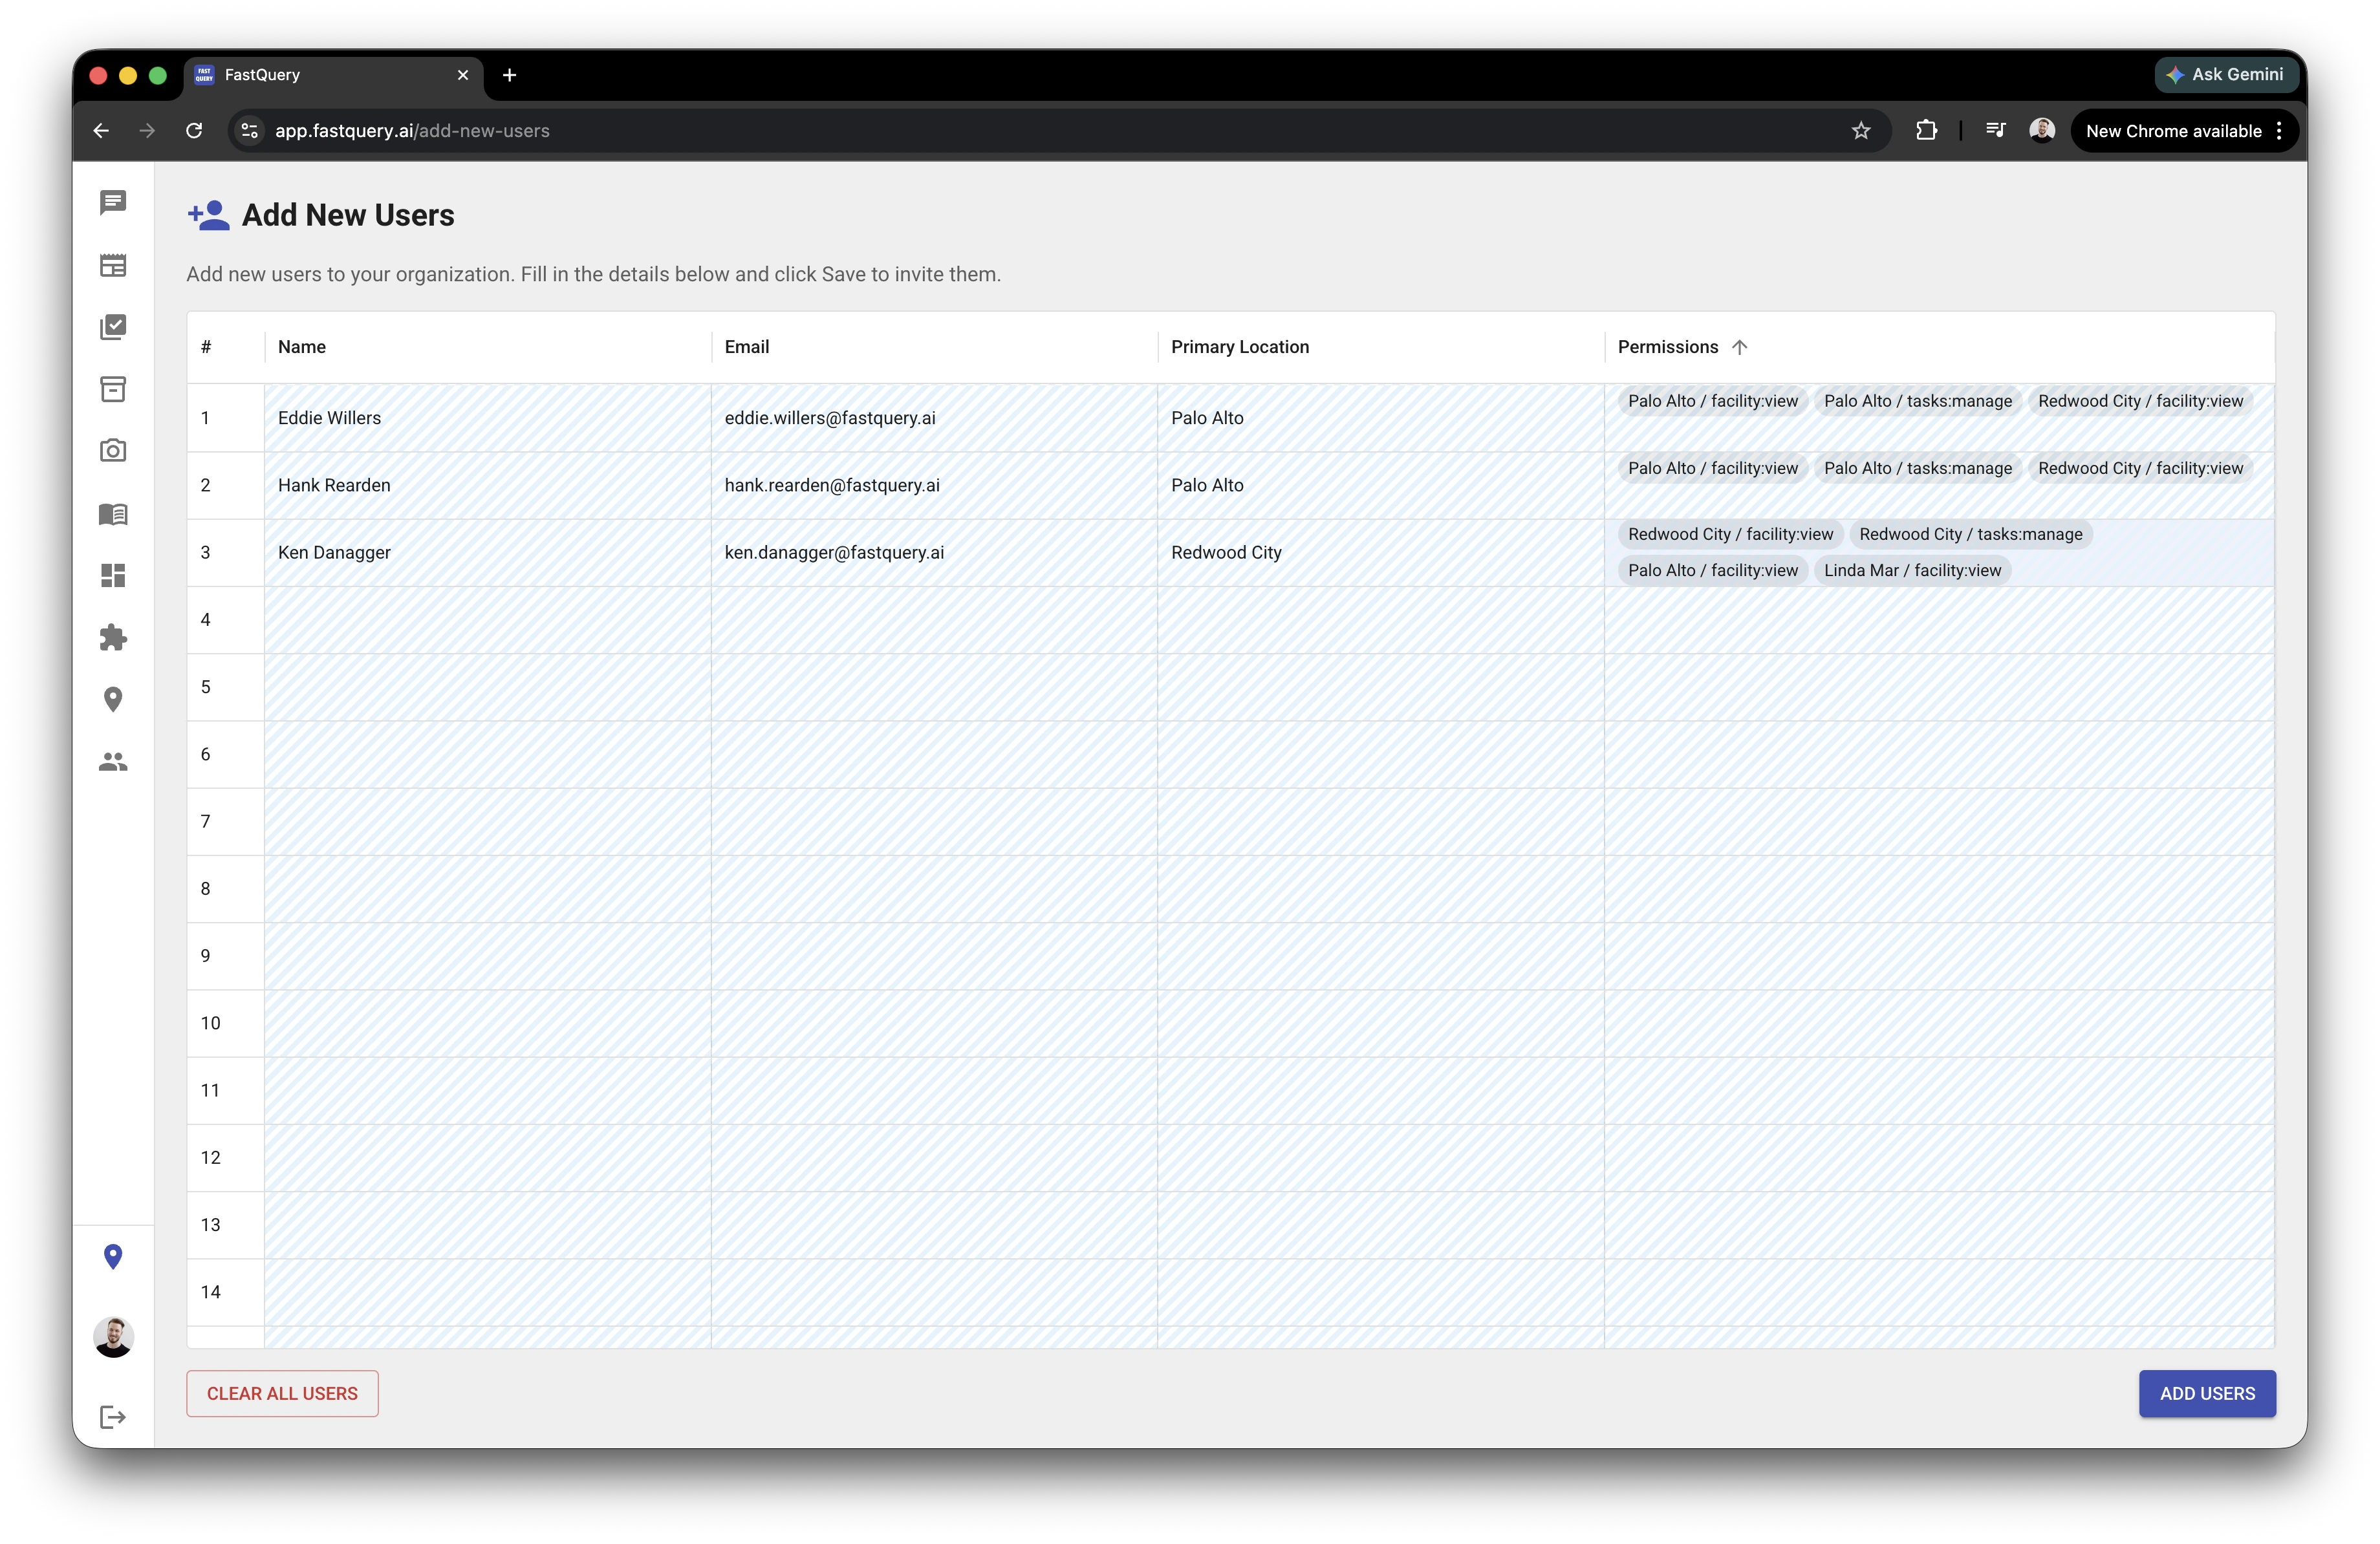
Adding Multiple Users at Once
Section titled “Adding Multiple Users at Once”Need to onboard a whole team? Use the bulk add feature in the data grid. You can enter multiple users’ information in a spreadsheet-style view and save them all at once. This is especially handy during seasonal hiring or when setting up a new facility.
Each row’s role is still just a starting point. If several people need the same custom access, set one row’s permissions the way you want, then copy and paste that permission set onto the other rows so they all match. See Customizing access.
Editing a User
Section titled “Editing a User”Click on any user to update their details. You can change their:
- Name — if someone’s name needs correcting
- Role and permissions — to give them more or less access; pick a different preset or fine-tune individual capabilities (see Customizing access)
- Facility assignments — to control which inventory and data they can see, and which is their home facility
Changes take effect immediately.
Deleting a User
Section titled “Deleting a User”If someone leaves your team or no longer needs access, you can delete their account from the Users page. This removes their access to FastQuery entirely.
Resending an Invitation
Section titled “Resending an Invitation”If a team member didn’t receive their invite email or it expired, you can resend it from the Users page. Just find their name and click Resend Invitation.
Facility Assignments
Section titled “Facility Assignments”Users can be assigned to specific facilities, which controls what inventory, tasks, and feed content they see. This is a great way to make sure people only see information relevant to where they work. For more details, see Facilities and Roles and Permissions.
Managing Users on Mobile
Section titled “Managing Users on Mobile”Admins can also add, edit, and remove users directly from the FastQuery mobile app — handy when you’re on the floor and need to get someone set up quickly.