Knowledgebase

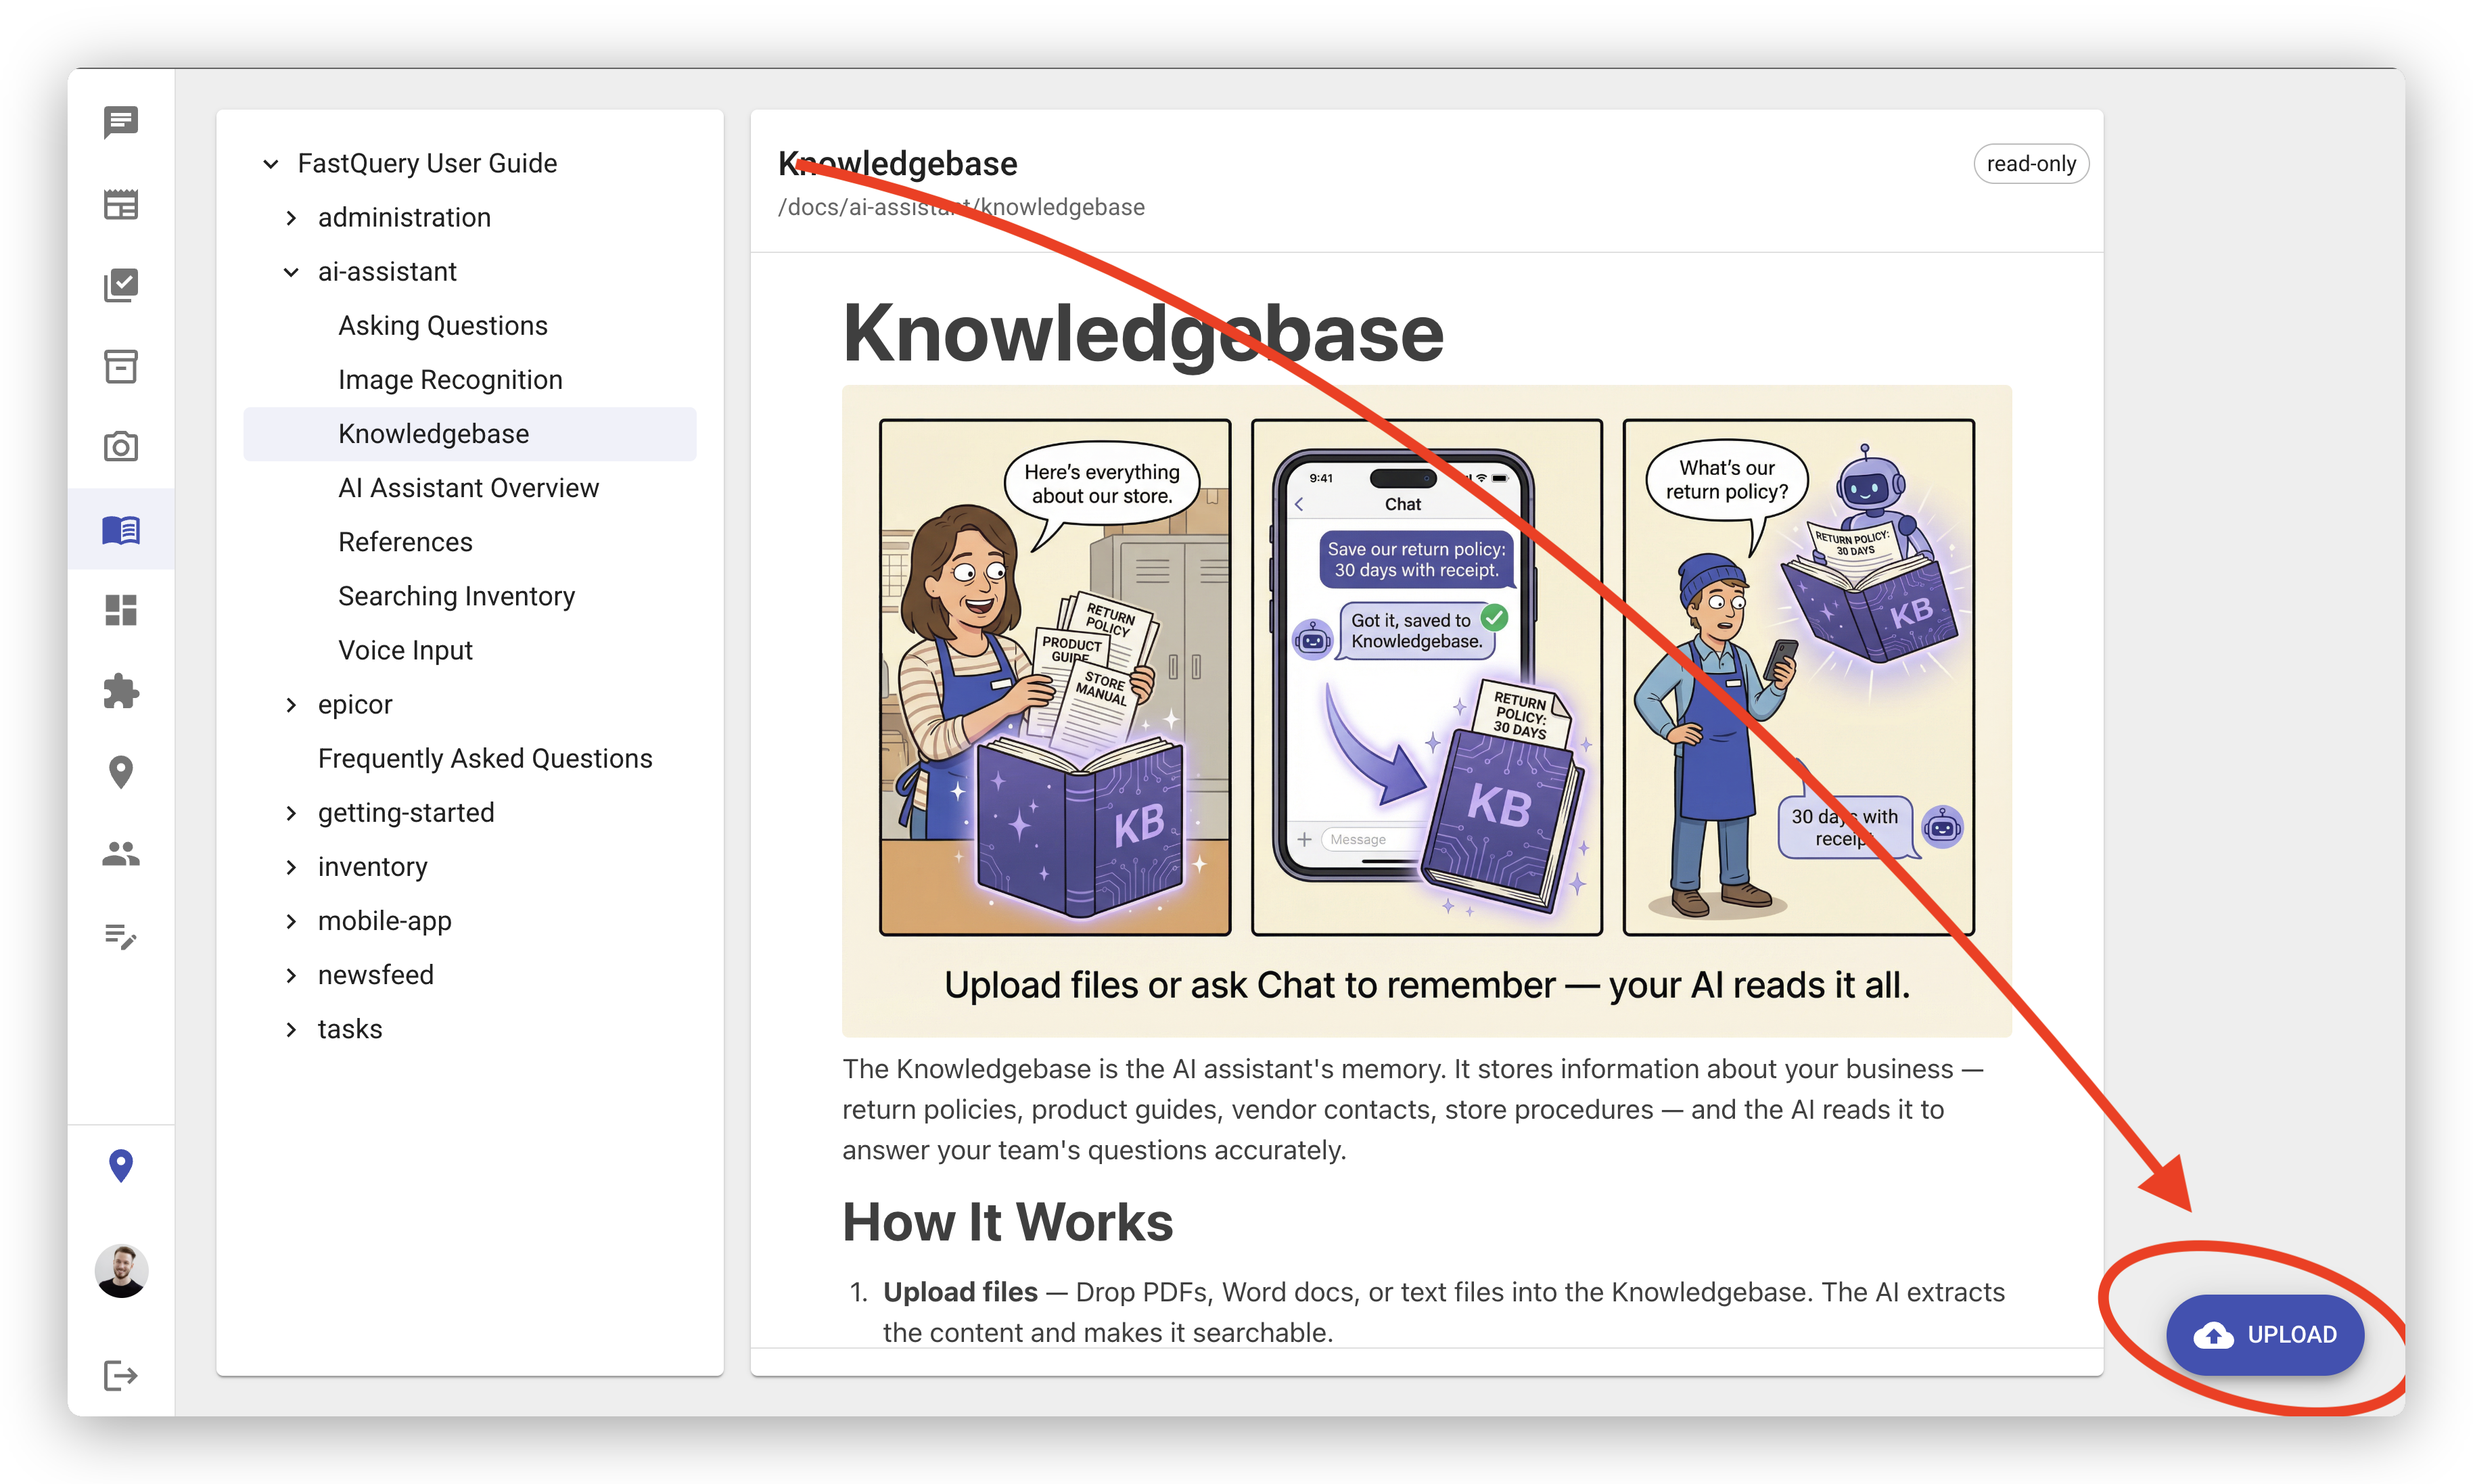
The Knowledgebase is the AI assistant’s memory. It stores information about your business — return policies, product guides, vendor contacts, store procedures — and the AI reads it to answer your team’s questions accurately.
How It Works
Section titled “How It Works”- Upload files — Drop PDFs, Word docs, or text files into the Knowledgebase. The AI extracts the content and makes it searchable.
- Teach it by chatting — Tell the AI to remember something in a conversation: “Save our return policy: 30 days with receipt.” It writes it to the Knowledgebase automatically.
- Everyone benefits — When anyone on your team asks a question, the AI checks the Knowledgebase first. The answer comes from your actual business information, not a guess.
Adding Information
Section titled “Adding Information”There are two ways to add content:
- Upload files — Click the Upload button (bottom-right corner) to upload documents. Supported formats: PDF, Word, TXT, CSV, Markdown, HTML, JSON, XML, and YAML. Up to 20 files at a time, 50 MB each.
- Ask the AI — In any chat conversation, ask the AI to save information. For example: “Add to the knowledgebase: our store hours are Mon–Sat 7am–8pm, Sun 9am–5pm.”
Browsing and Editing
Section titled “Browsing and Editing”The left panel shows all documents organized in a tree. Click any document to view its contents.
Admins and managers can edit documents directly — click the title or content to make changes, then save. You can also move documents to different paths or delete them.
Documents marked read-only are shared across all FastQuery customers (like this guide). Your organization’s own documents are fully editable.
Version History
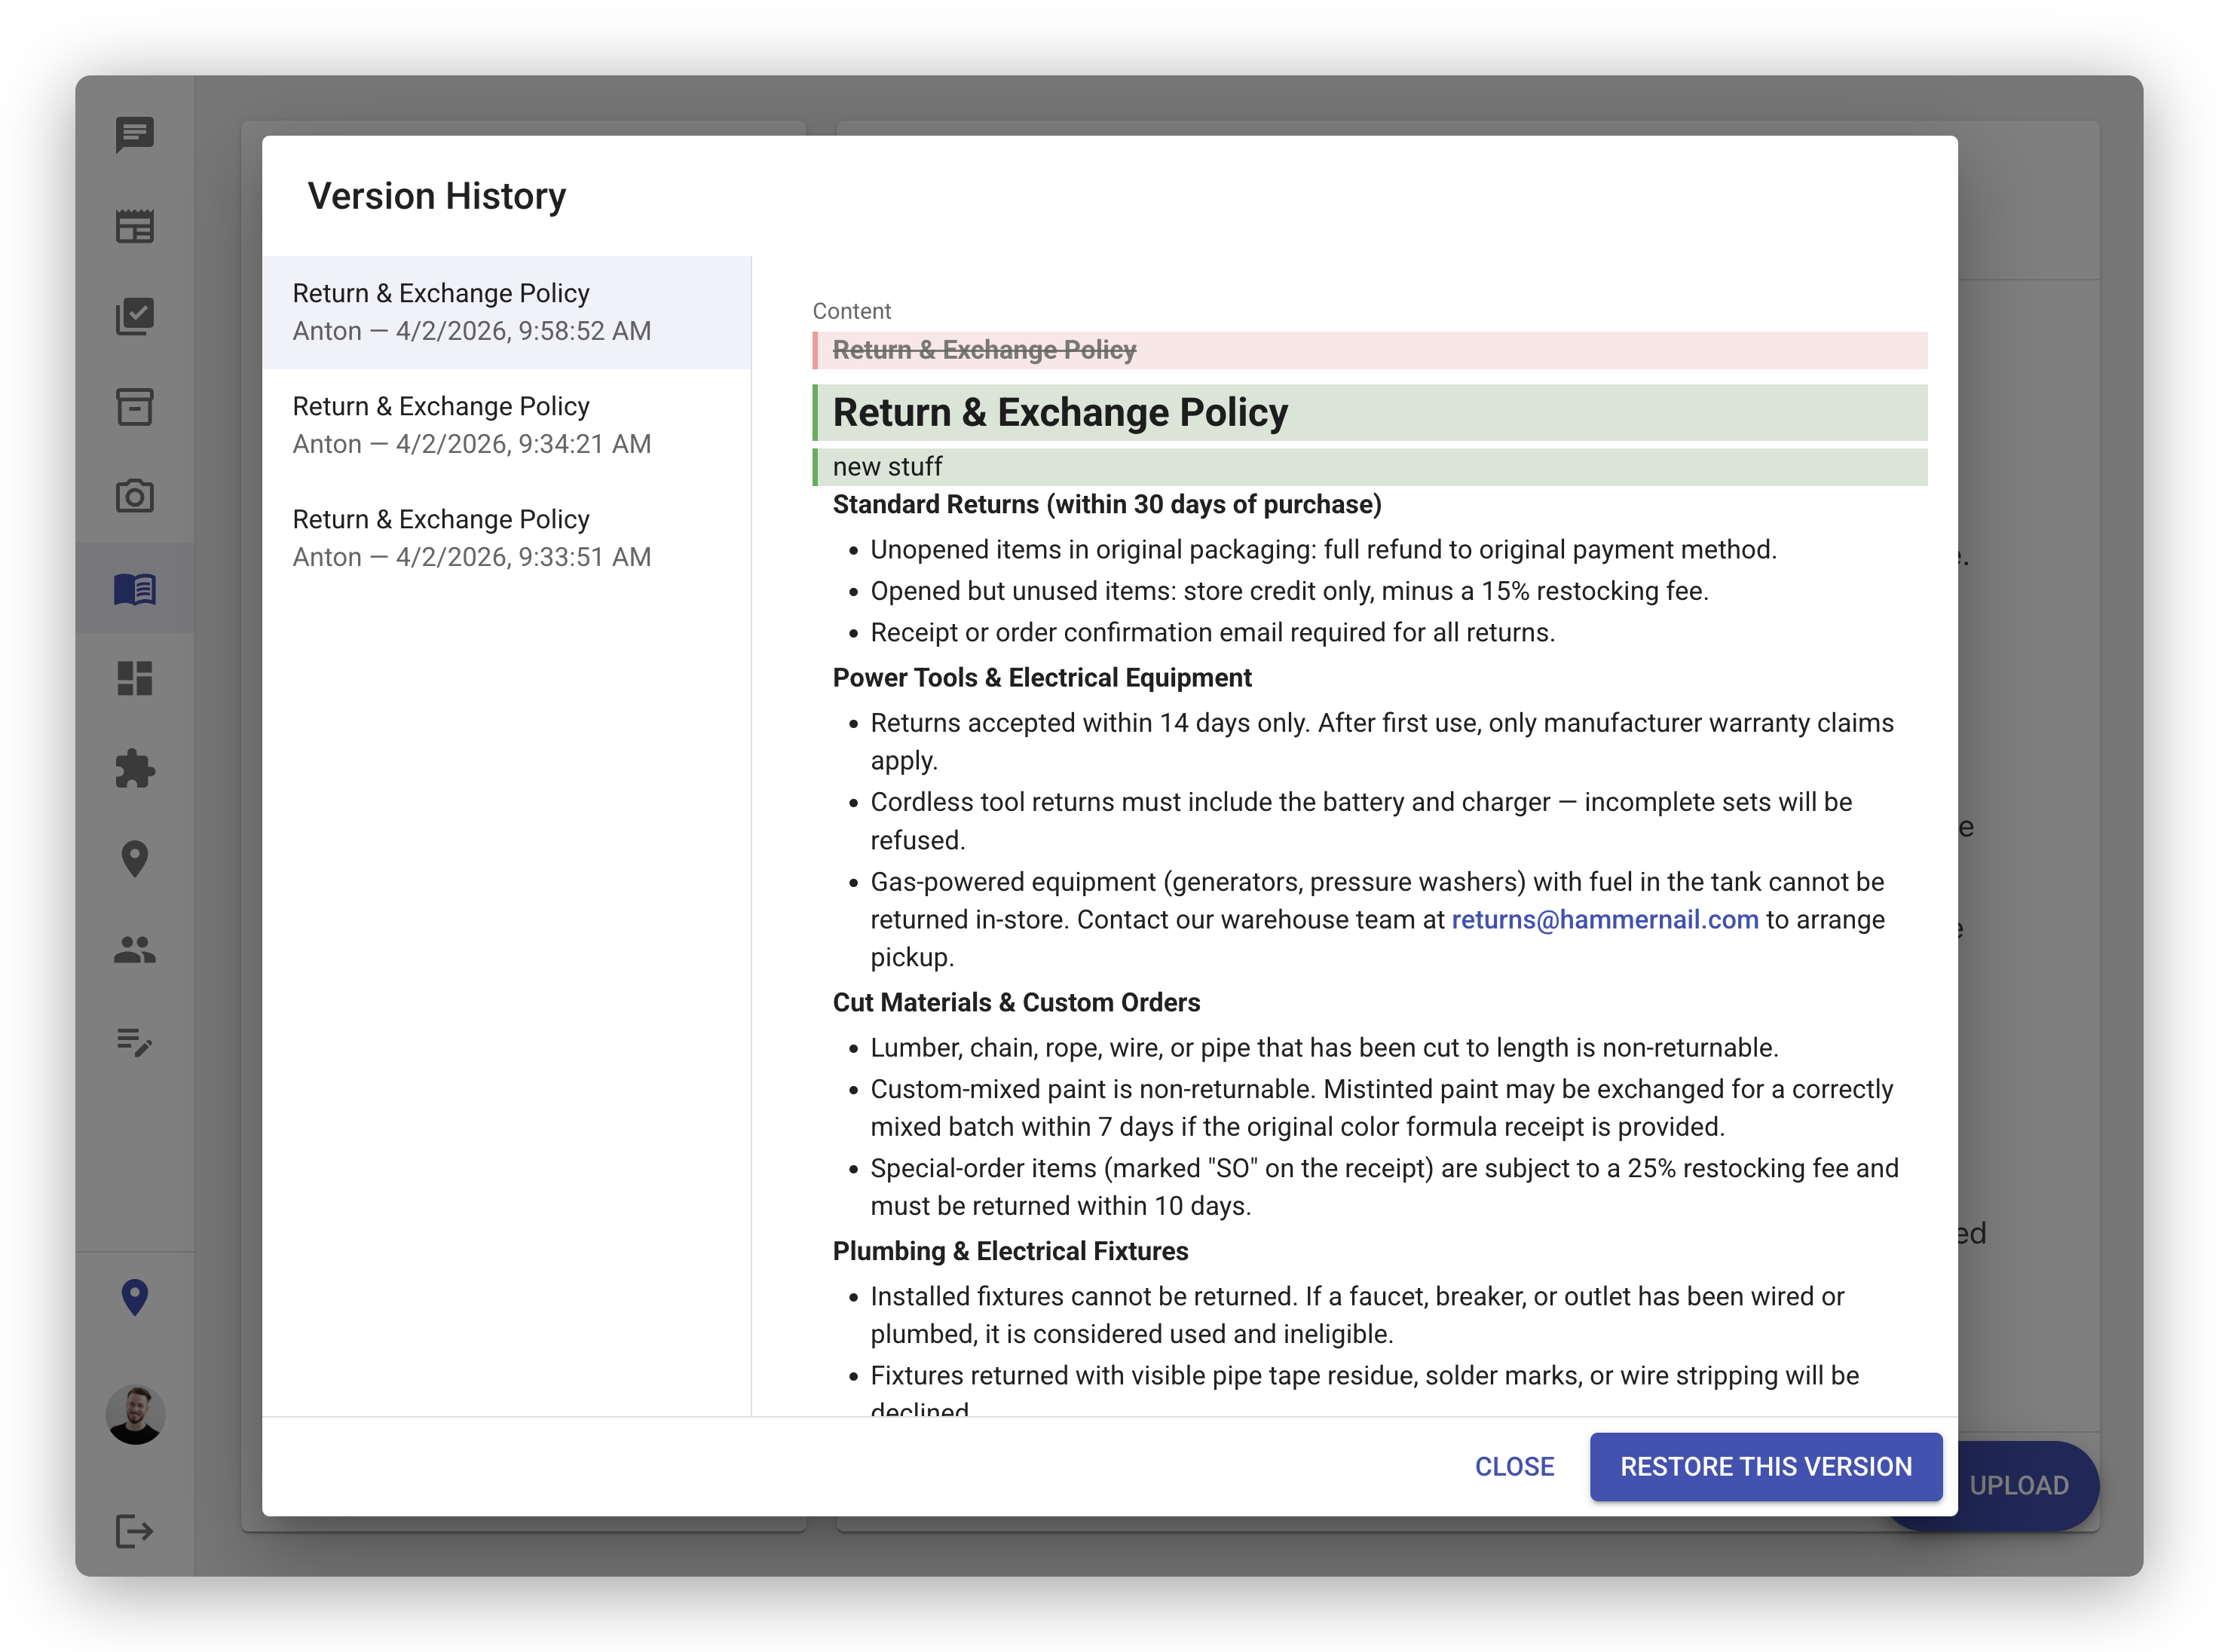
Section titled “Version History”Every time you save changes to a document, the previous version is automatically preserved. To view past versions:
- Open a document and click the History button at the bottom.
- The left panel shows all saved versions with the editor’s name and timestamp.
- Select a version to see what would change if you restored it — green highlights show content that would be added back, and red highlights show content that would be removed.
- Click Restore this version to revert the document.
Deleted documents can be recovered within 30 days. After that, they are permanently removed.