

Epicor Eagle Integration
FastQuery syncs with Epicor Eagle through scheduled Compass reports. You don’t build the reports by hand — download our ready-made Compass query files, import them, and schedule them.
Two reports are required. They power the core experience: live inventory, item lookups, and everything the assistant knows about what’s on your shelves.
| Query | Query file | What it sends | File name | Schedule |
|---|---|---|---|---|
| FastQuery Catalog | FastQuery-Catalog.xgp | The full item catalog for every store — one snapshot, all stores in one file (or one file per store) | catalog |
Once a night |
| FastQuery Realtime | FastQuery-Realtime.xgp | Today’s quantity-on-hand changes, so FastQuery reflects movements as they happen | realtime |
Every 5–15 min while open |
Eagle can export much more than these two — sales history, receiving, purchase orders, promotions. Those feed the AI assistant’s Advanced Mode and are covered separately in Advanced Data Exports.
Before you start
Section titled “Before you start”- Compass Scheduler is running. Scheduled reports won’t run without it — see How to Enable the Compass Scheduler.
- ITR Journaling is on. The Realtime report reads from it — see Troubleshooting below.
- Your FastQuery connection details are handy. Open your Integrations → Epicor Eagle page — click Create SFTP credentials there and it shows the SFTP address, username, and password your reports will deliver to.
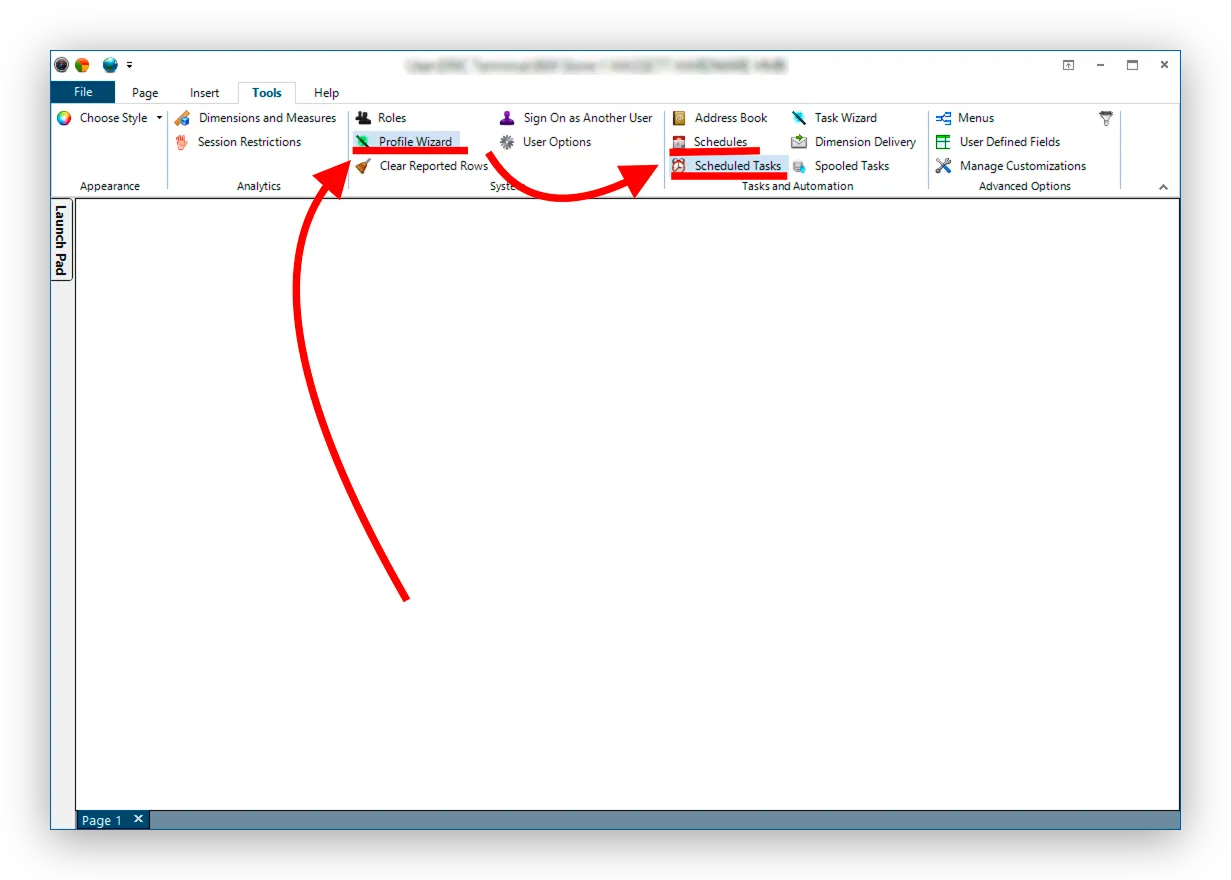
Everything below happens on the Tools tab of the Compass ribbon. The three buttons you’ll use — Profile Wizard, Schedules, and Scheduled Tasks — are all there:
Step 1: Download the query files
Section titled “Step 1: Download the query files”Download both files to the computer running Compass:
Step 2: Import the queries
Section titled “Step 2: Import the queries”For each of the two files:
- Go to Tools > Profile Wizard > Import Profile.
- Select scope: System.
- Name it exactly after the file: FastQuery Catalog for the first, FastQuery Realtime for the second.
Editing the queries. You can add columns to an imported query if you need to. Don’t remove or rename the columns already in it — the export will be rejected on arrival. Any added column FastQuery doesn’t recognize is ignored.
Step 3: Create the schedules
Section titled “Step 3: Create the schedules”Go to Tools > Schedules and create two schedules:
- A nightly schedule — runs once a night, 1–2 hours after your last store closes.
- A realtime schedule — runs every 5, 10, or 15 minutes (up to you) during business hours.
Step 4: Create a scheduled task for each query
Section titled “Step 4: Create a scheduled task for each query”This is where the query, the schedule, and the delivery to FastQuery come together. Do this once for FastQuery Catalog, then again for FastQuery Realtime.
-
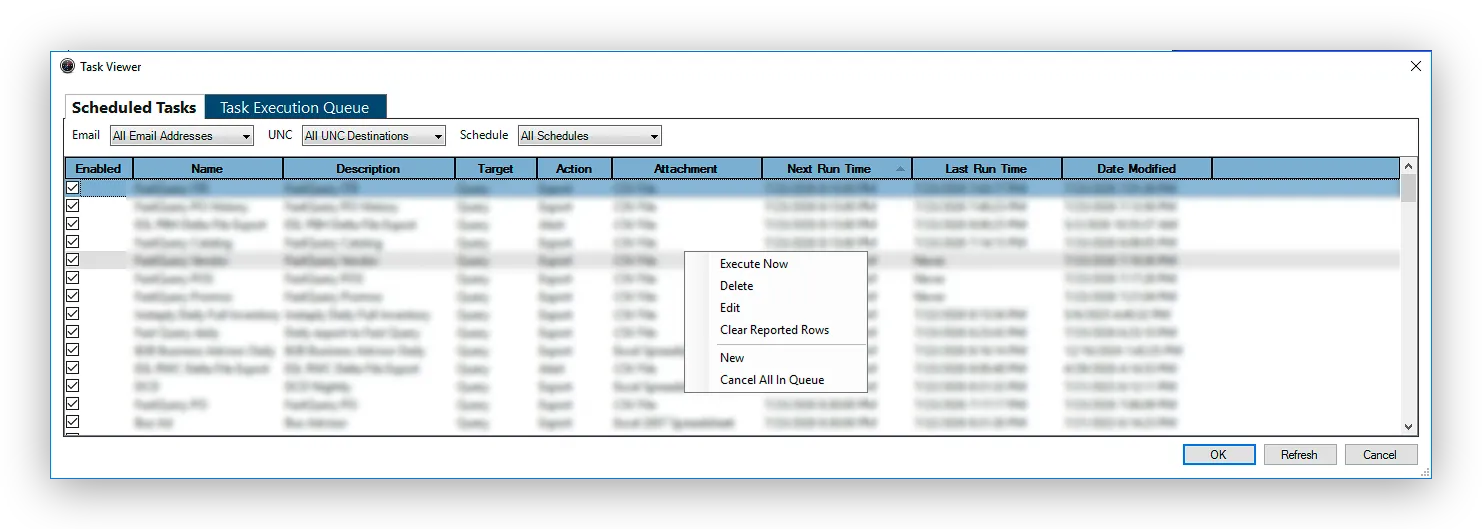
Go to Tools > Scheduled Tasks. Right-click anywhere in the task list and choose New.
-
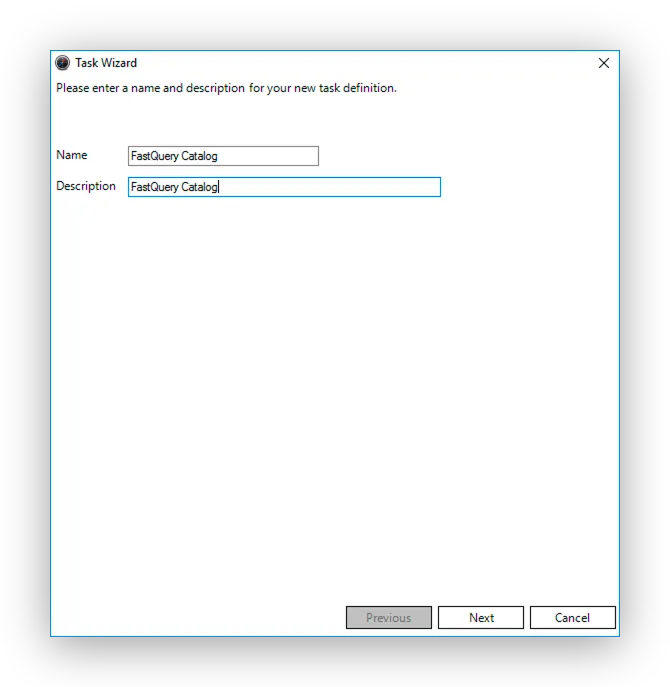
Name the task after the query — FastQuery Catalog. Click Next.
-
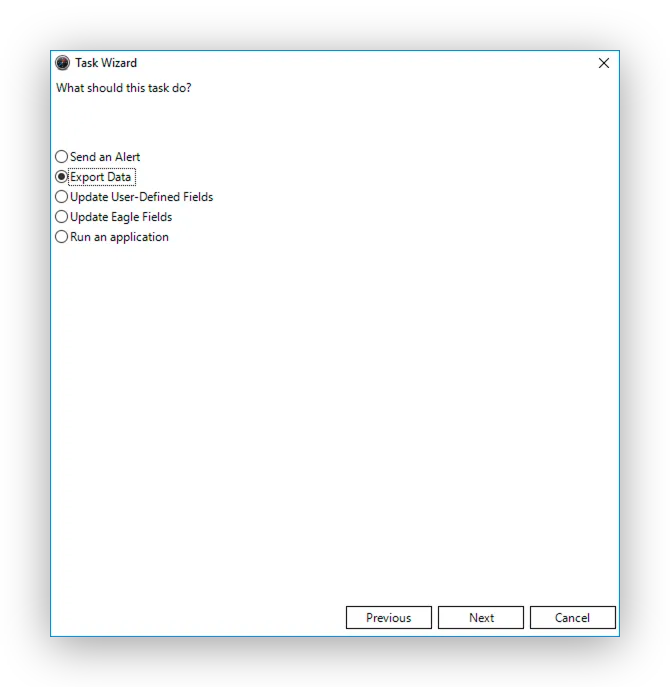
Choose Export Data. Click Next.
-
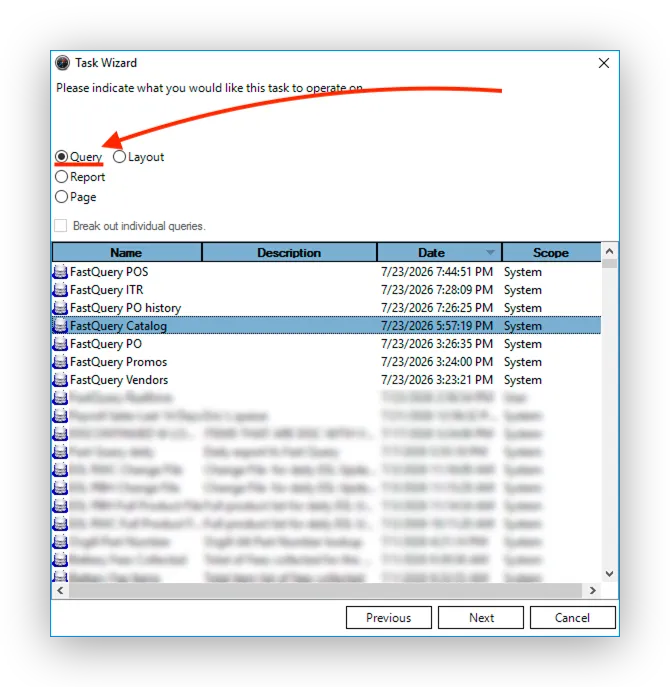
Choose Query, then select FastQuery Catalog in the list. Click Next.
-
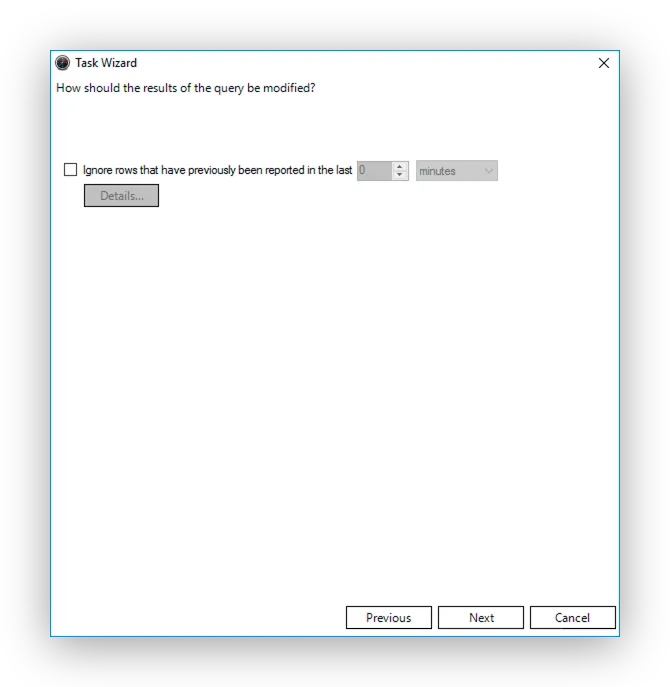
Change nothing on the “How should the results be modified?” screen — leave the checkbox unchecked and click Next.
-
Choose CSV File. Under File Name Option, choose User-supplied and type the file name from the table above —
catalogfor this task,realtimefor the other. Leave Append Date to File Name selected. Click Next.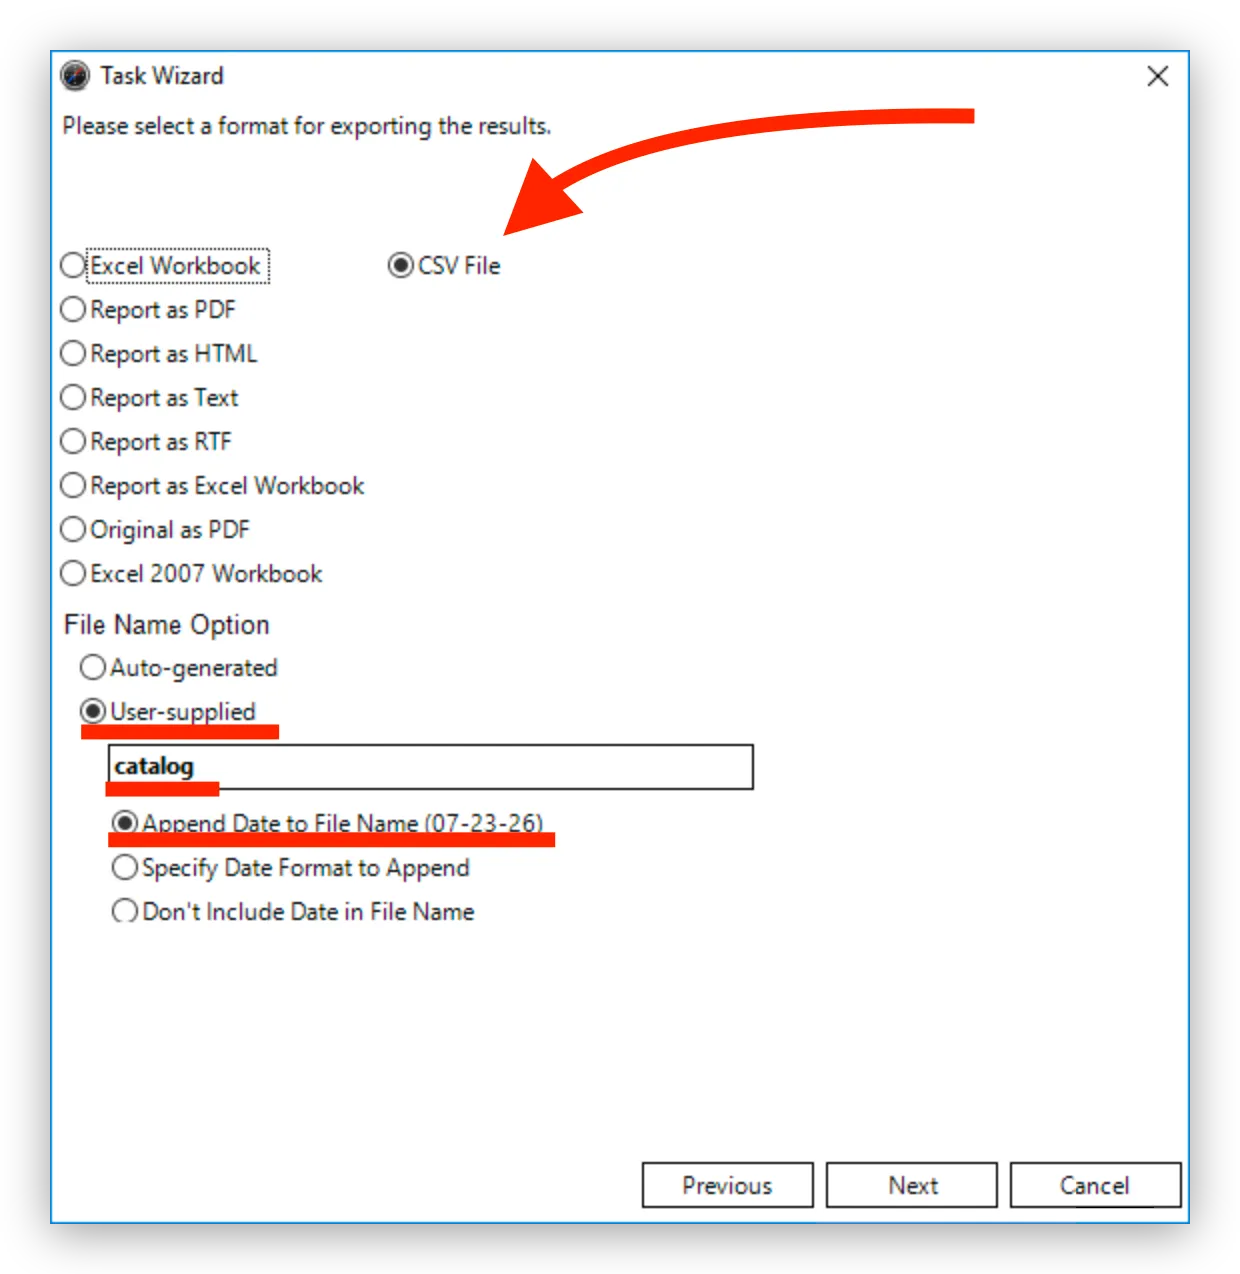
The file name is how FastQuery recognizes each report. A file starting with
catalogloads as your catalog; one starting withrealtimeloads as a live inventory update. Type it exactly as shown in the table — a different name won’t load into the right place. -
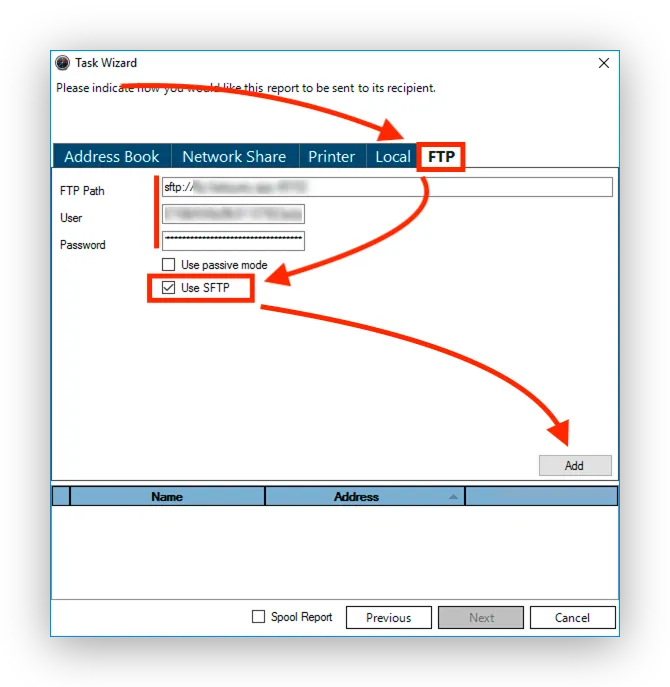
Open the FTP tab. Enter the FTP Path, User, and Password from your Integrations → Epicor Eagle page. Check Use SFTP, click Add, then Next.
-
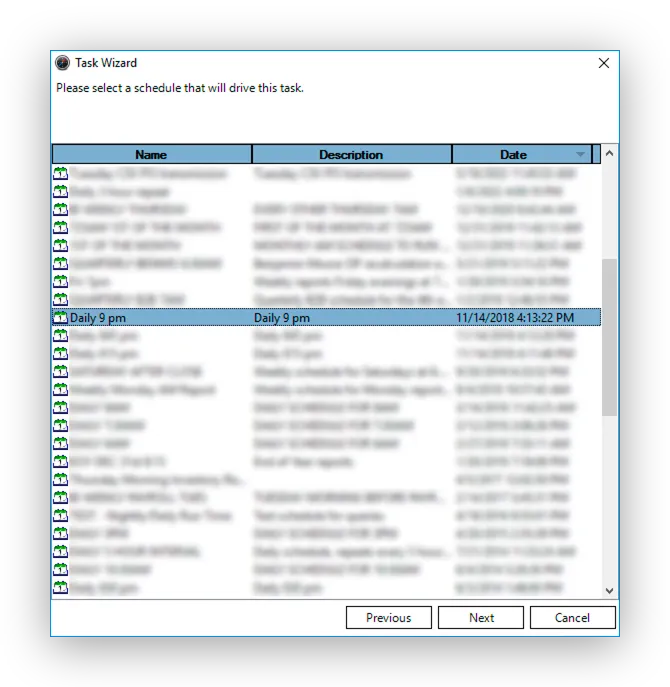
Select the schedule for this task — the nightly schedule for FastQuery Catalog, the realtime schedule for FastQuery Realtime. Click Next.
-
Check the summary and click Finish.
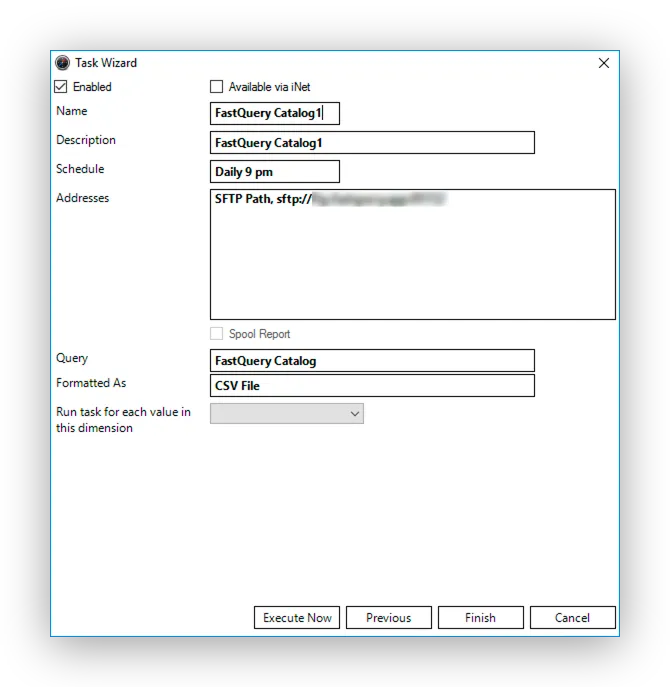
Now repeat these nine steps for FastQuery Realtime.
Optional: one catalog file per store
Section titled “Optional: one catalog file per store”By default the catalog task sends all stores in one file, and that works fine. If you’d rather send a separate catalog file per store, use Compass’s Dimension Delivery — it runs the task once per store and delivers each store’s file on its own. FastQuery accepts either shape.
-
Create a Dimension Delivery item that points at the same FastQuery SFTP details — watch the Dimension Delivery setup video.
-
Open the FastQuery Catalog task for editing. Set Run task for each value in this dimension to Store, and pick your delivery item under Dimension delivery item.
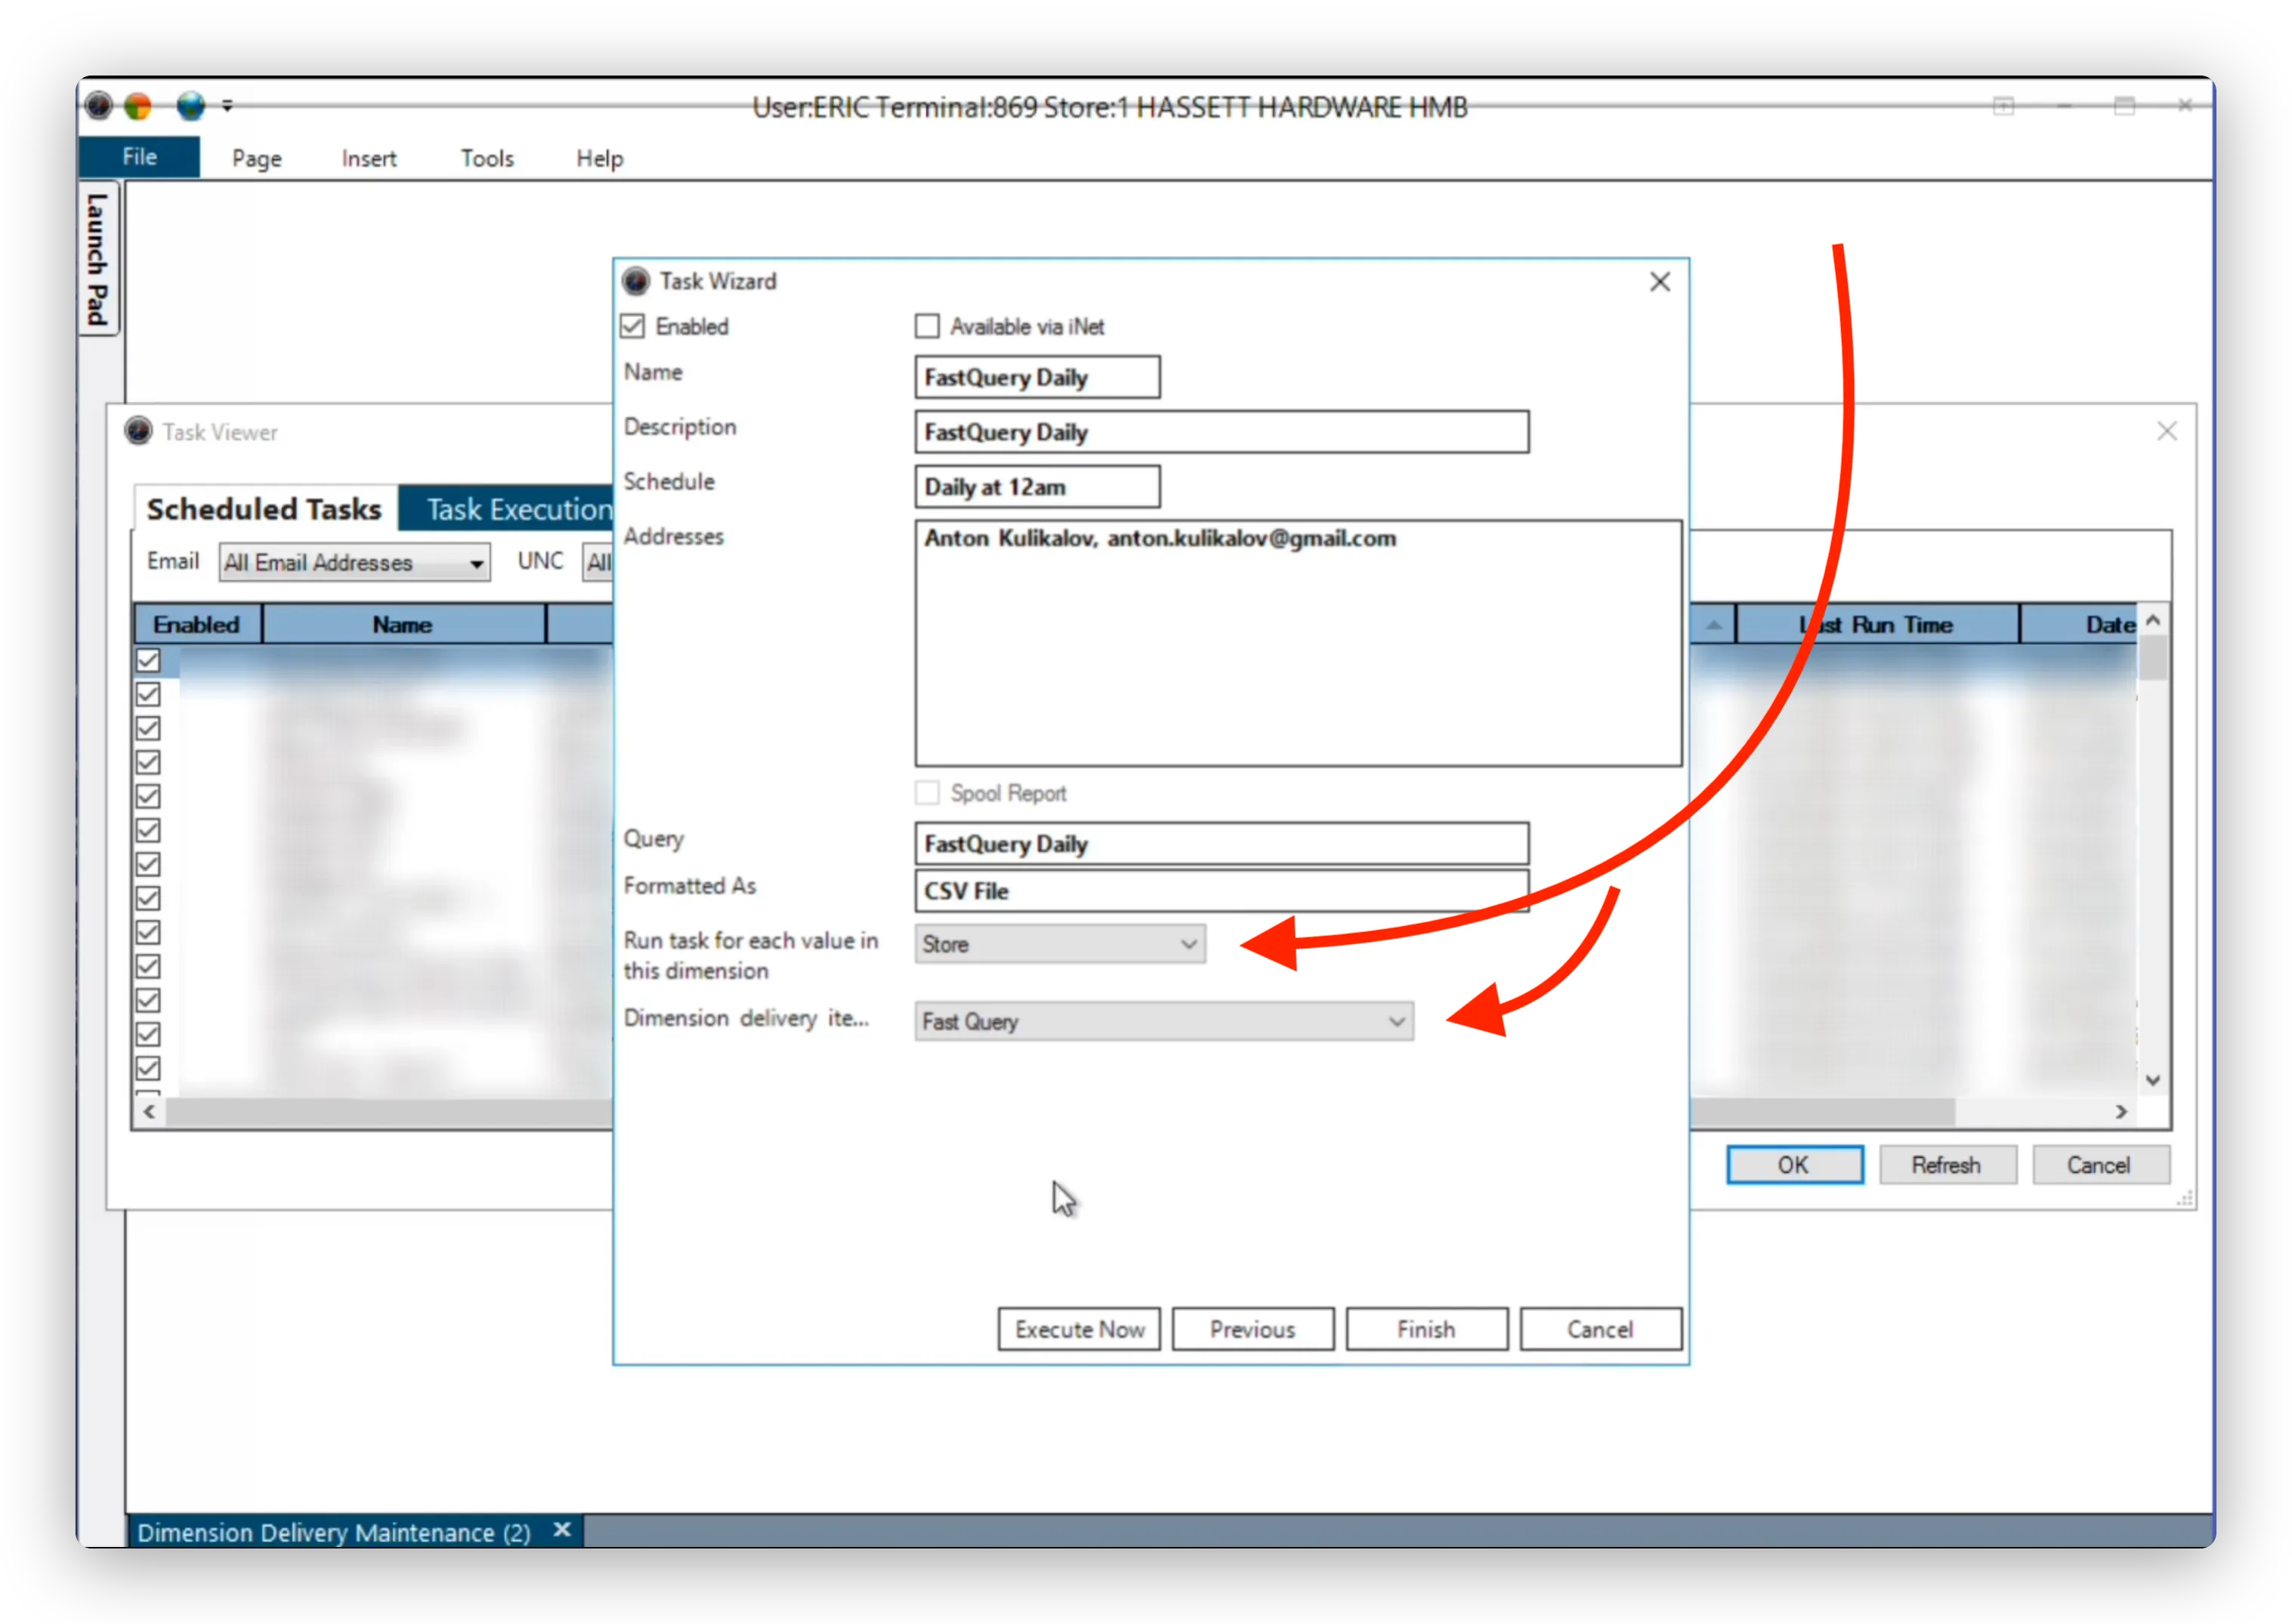
Catalog and history exports only. Dimension Delivery works for the catalog export and for the POS, ITR, and PO History exports among the Advanced Data Exports. Leave FastQuery Realtime and the other advanced exports (vendor, promos, open POs) delivering as a single task without it.
Step 5: Verify it’s working
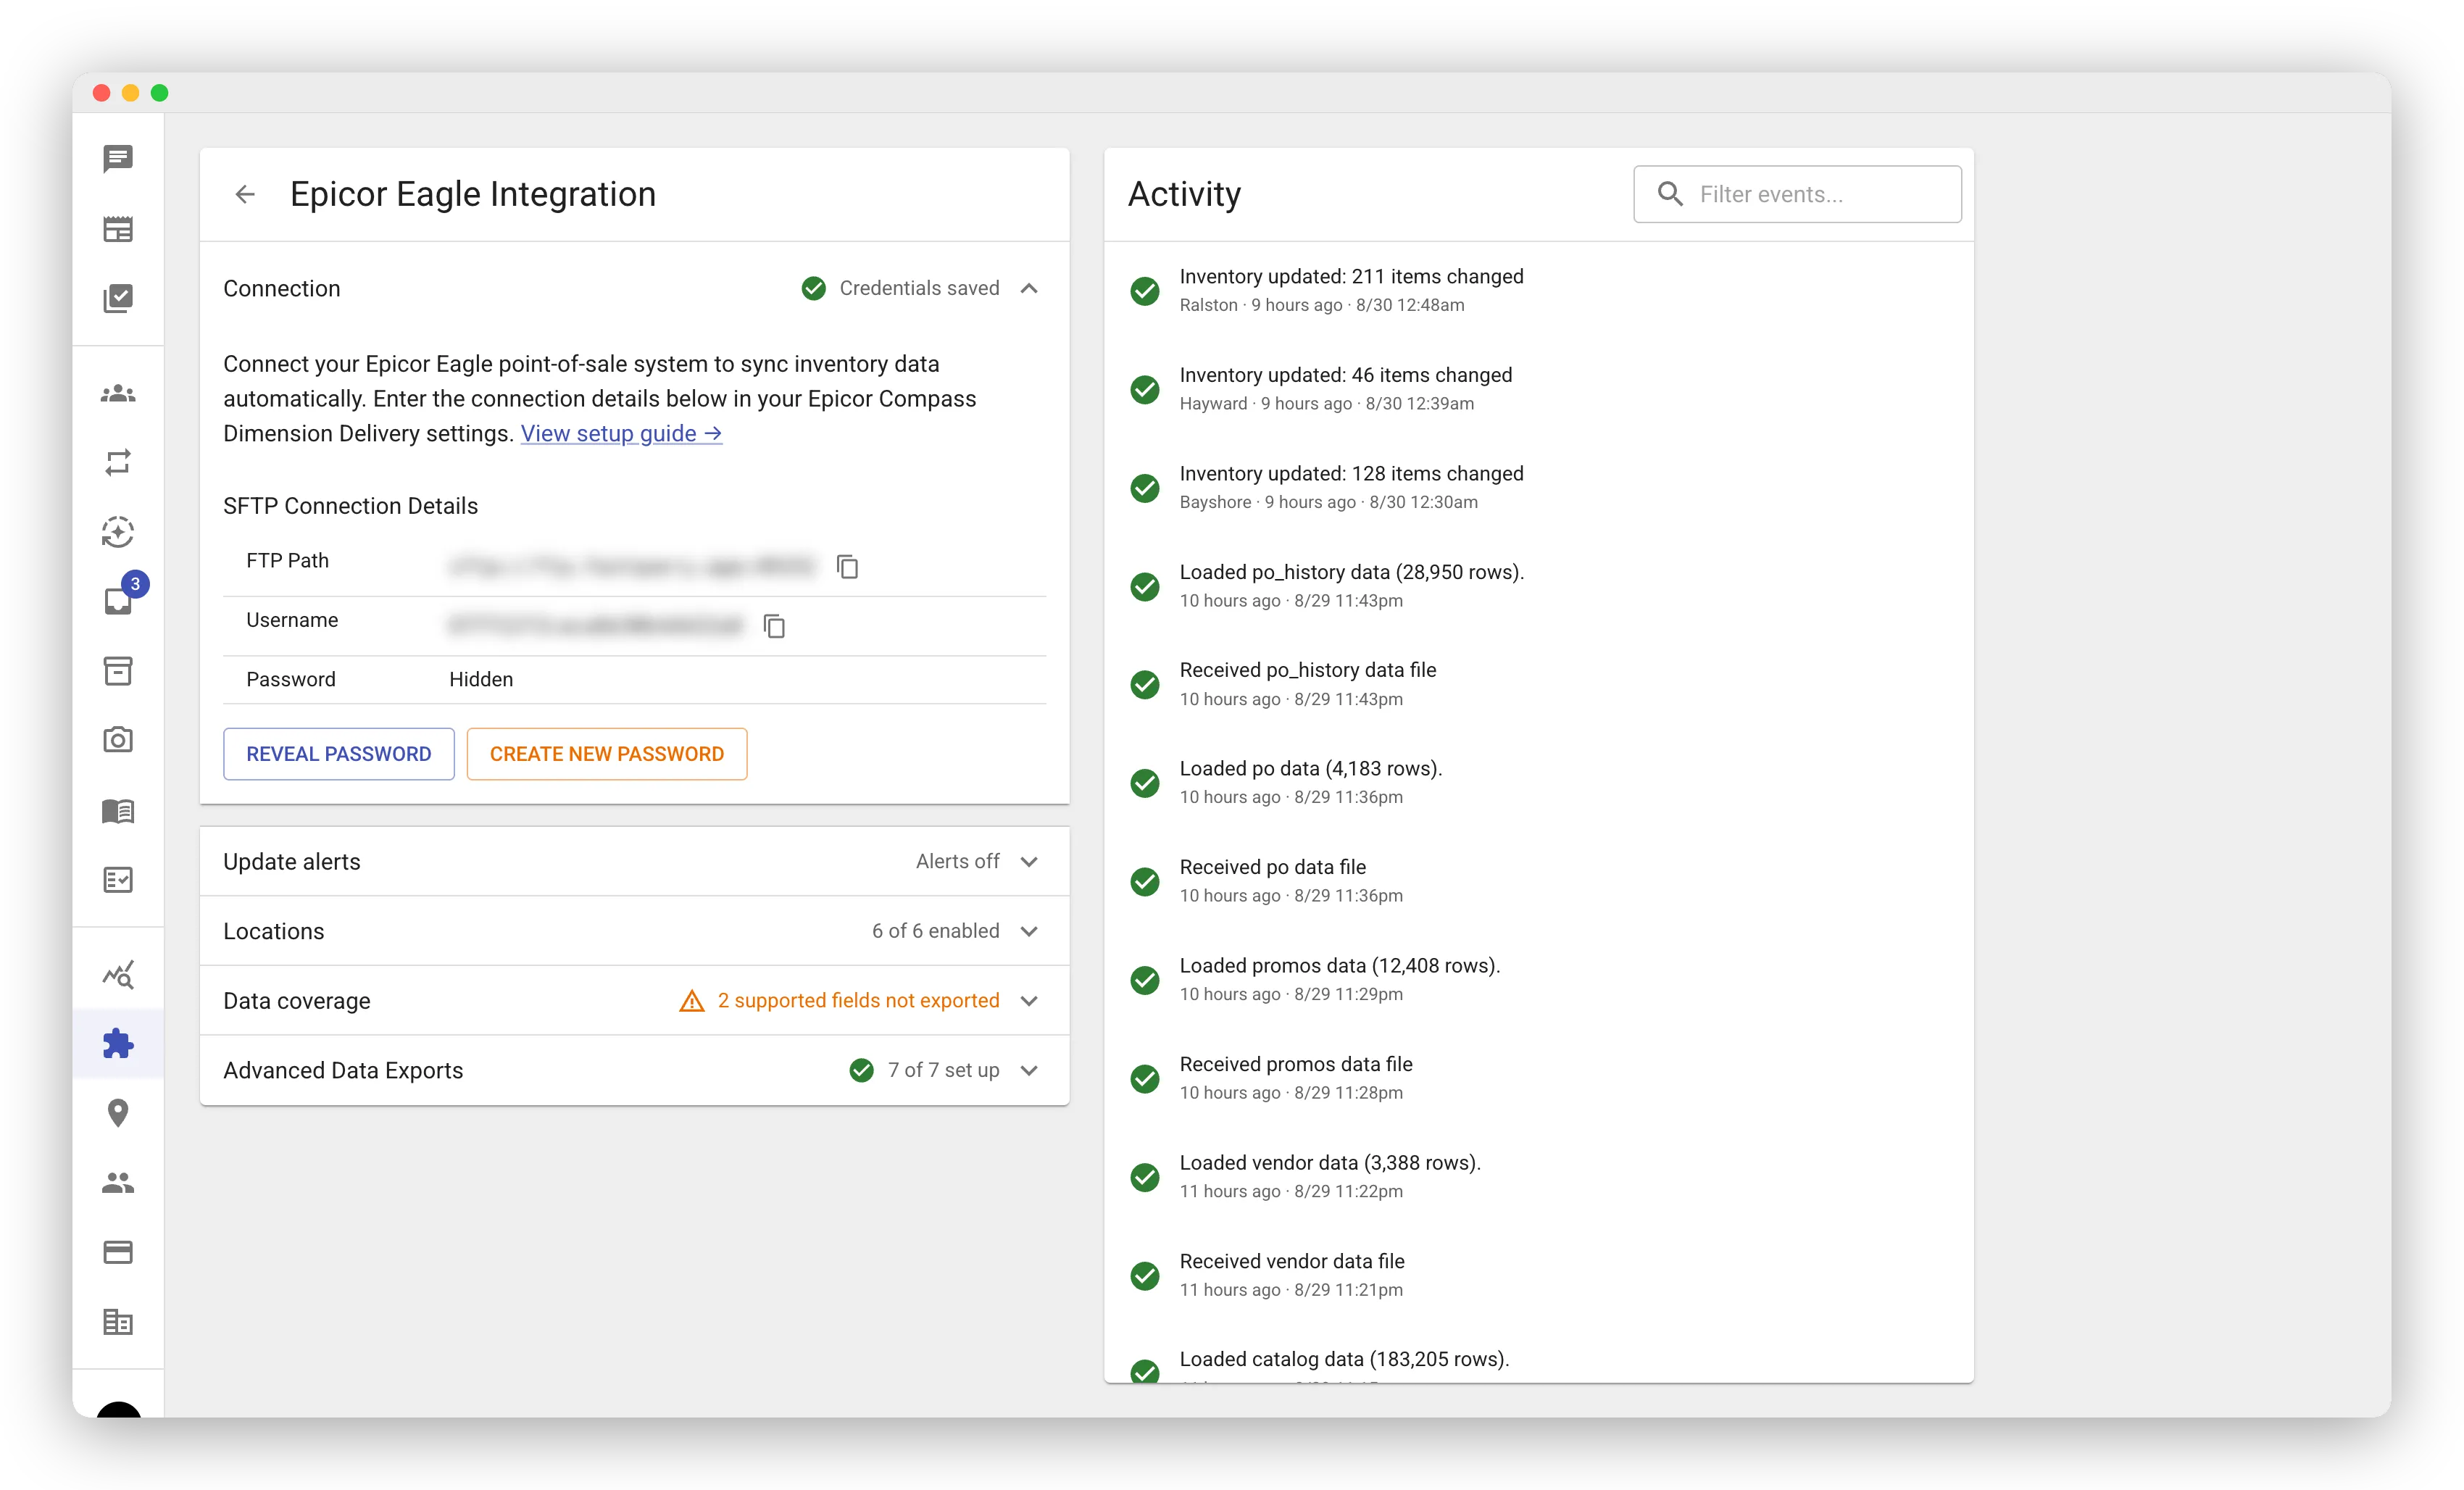
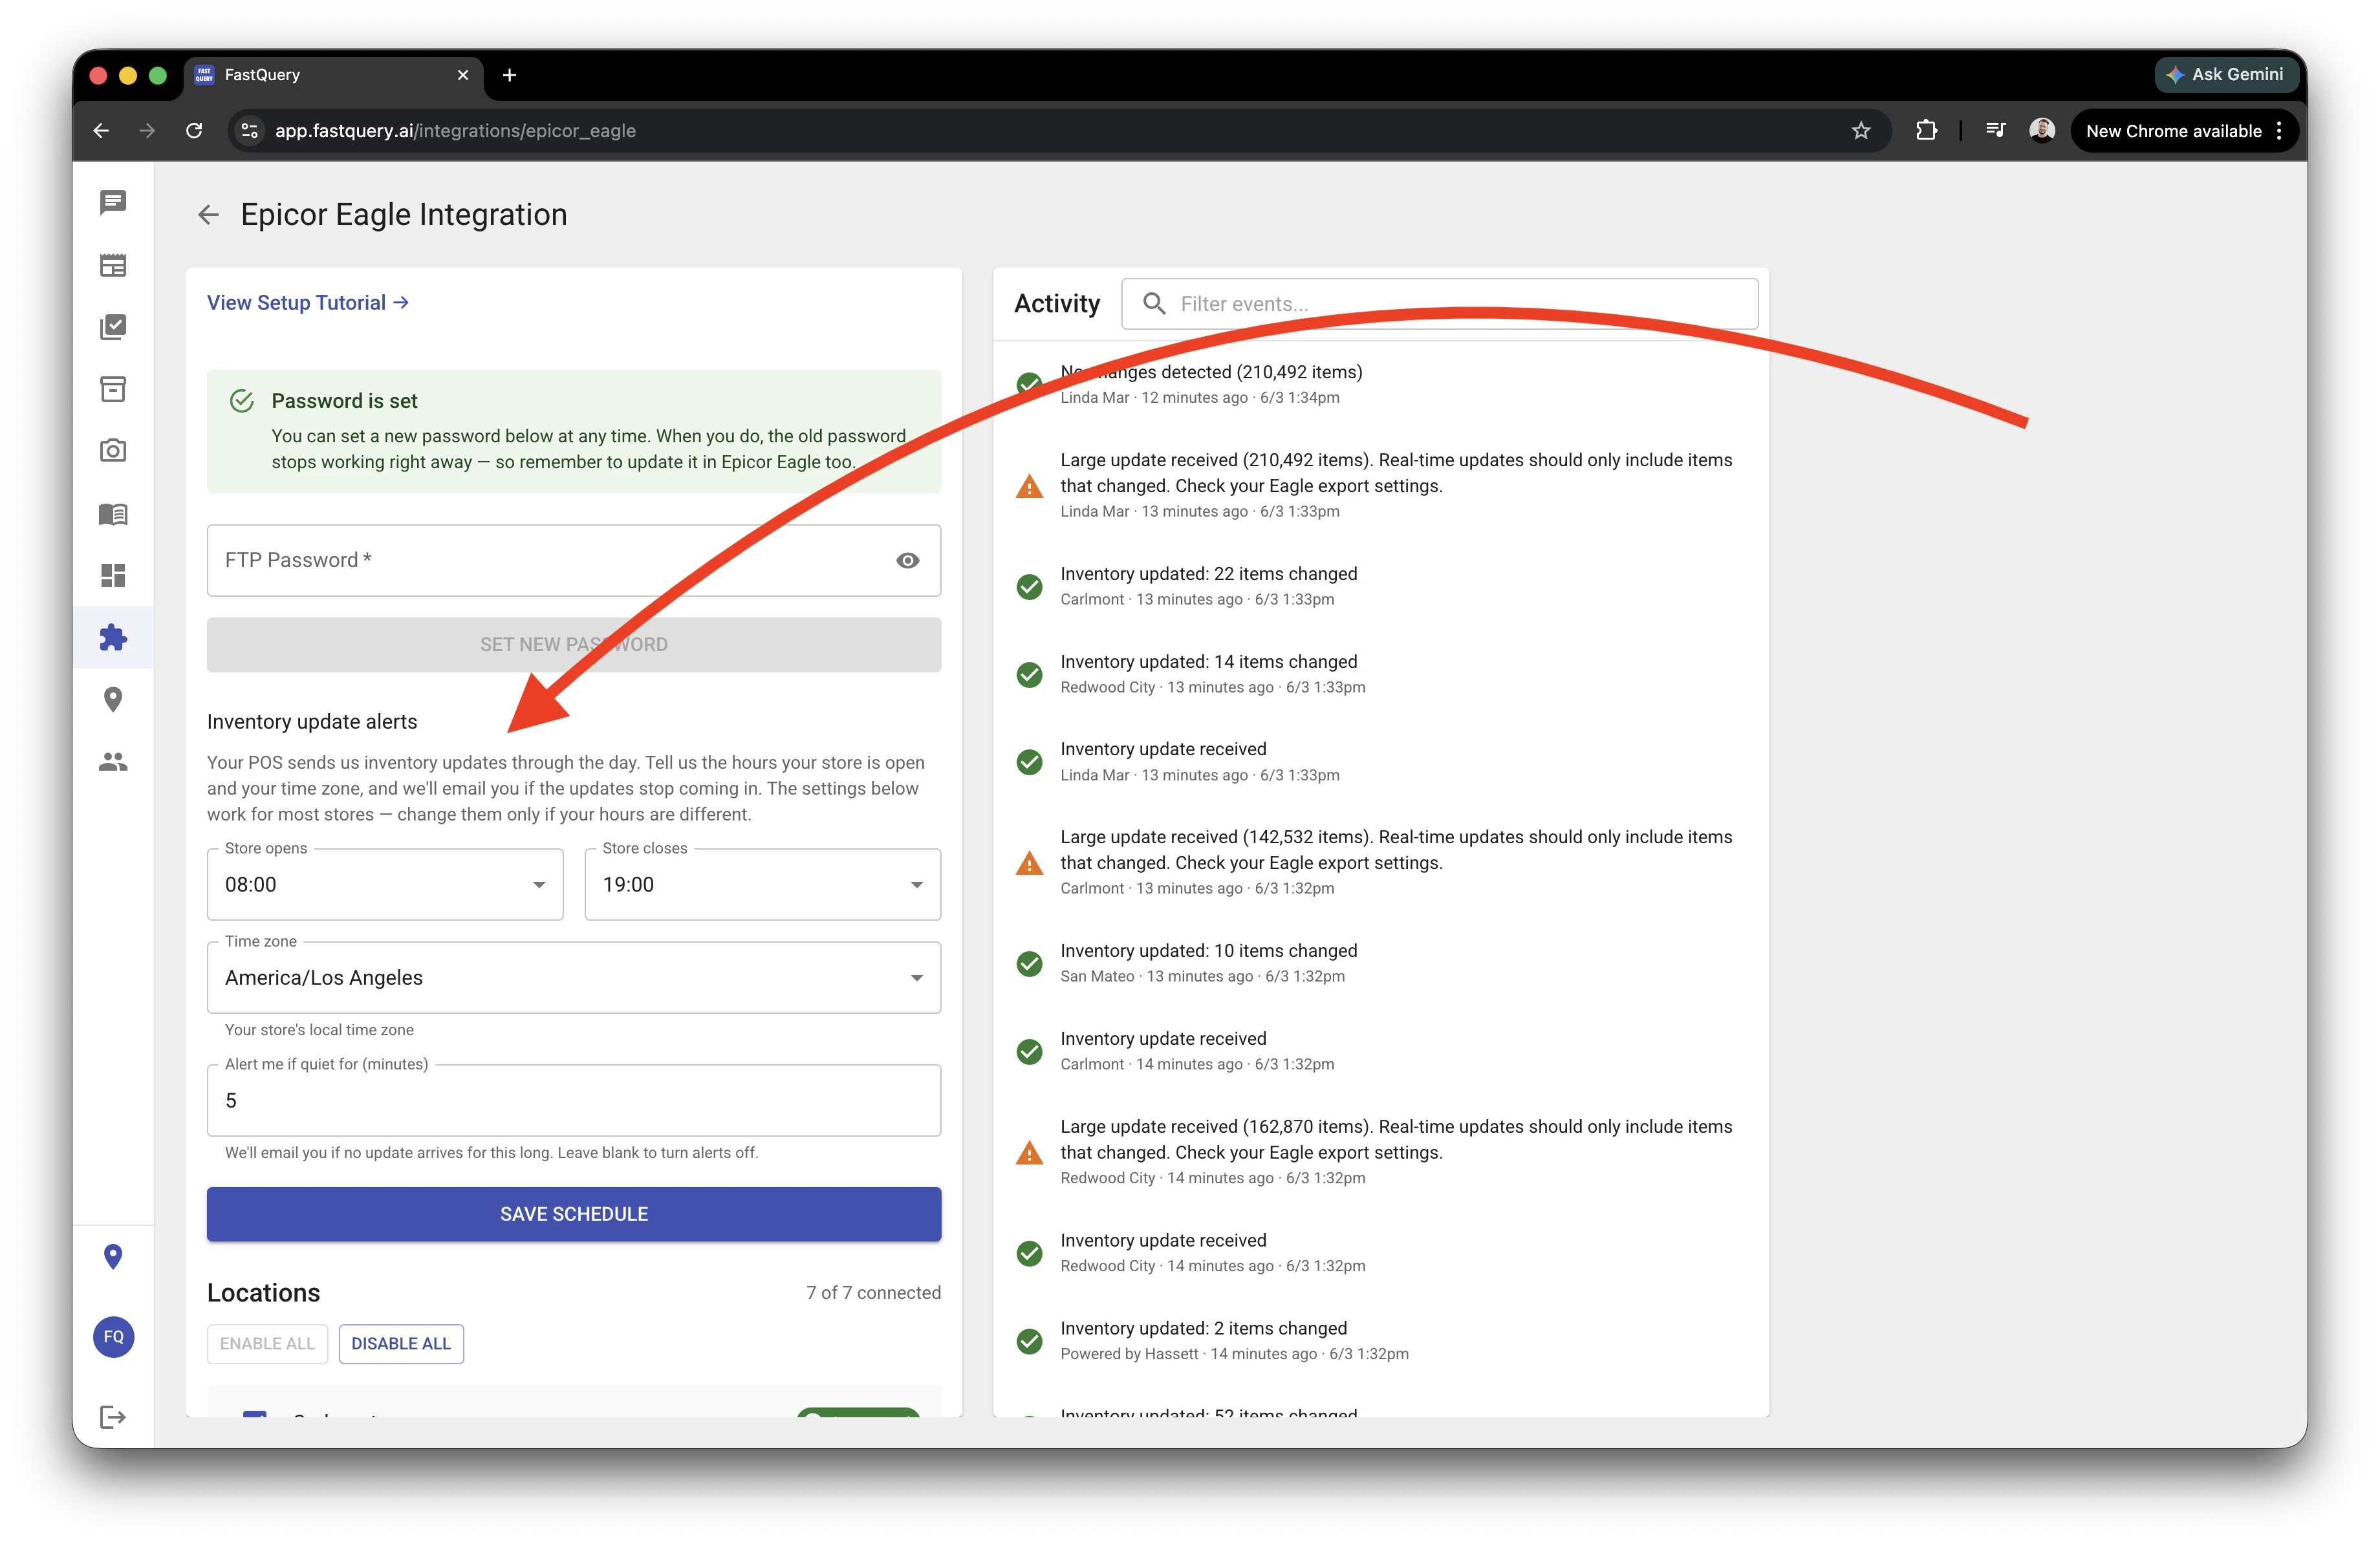
Section titled “Step 5: Verify it’s working”Back in FastQuery, open Integrations → Epicor Eagle. Within a few minutes of the first delivery you’ll see the files arrive in the activity feed, and inventory counts start filling in. Tip: Execute Now on the summary screen (or right-click a task > Execute Now) sends a file immediately, so you don’t have to wait for the schedule.
Duplicates are handled for you. If your catalog export produces more than one row for the same item at a store (for example, one row per UPC), FastQuery keeps a single row per store and item automatically — no need to tune the export.
Inventory-update alerts (store hours)
Section titled “Inventory-update alerts (store hours)”FastQuery can alert you when the inventory feed goes quiet — no updates for longer than you’d expect. To keep those alerts honest, set them to your store’s real hours so you’re not pinged when the store is simply closed.
On the Epicor Eagle integration page, set:
- Open and close times — the hours your store is actually trading.
- Time zone — the store’s local time zone, so open and close are read correctly.
- Alert me if there are no updates for N minutes — how long the feed can stay quiet during open hours before FastQuery flags it.
Leave the “no updates for N minutes” field blank to turn these quiet-period alerts off entirely.
With this set, a closed or naturally quiet store won’t trigger a false “feed down” alert — you only hear about it when an update gap happens during the hours you’d expect data to be flowing.
Troubleshooting
Section titled “Troubleshooting”How to enable ITR Journaling
Section titled “How to enable ITR Journaling”ITR Journaling must be turned on for the Realtime report to work.
How to enable the Compass Scheduler
Section titled “How to enable the Compass Scheduler”Your reports won’t run until the Compass Scheduler is started. See How to Enable the Compass Scheduler for a step-by-step walkthrough.